Mar 3
Our group: Vivian, Adham, Cassie, Nico
We started off with some brainstorming for our interactions and actions:
Initial Ideas:
- Throwing crumpled paper into a basket
- Implement points based on how far back you are → makes you move around
- Obstacles (desk, etc.)
- Crumpling paper
- Classroom, library
- Putting food onto tray- cafeteria
- Washing face
- Taking care of plants
- Zen
- If you cut the plants they just float around
- Twisting knob motion to speed up time → plants grow, lighting changes
- Drawing
- Slingshot
- Flipping coin into fountain
- Something could pop out, you have to catch it
After deciding on the plant idea we enjoyed, we decided to go more into details:
Taking care of plants:
- Time
- Lighting changes
- Sun/moon
- Plant growth
- Environment ideas:
- Dorm room
- Windowsill
- Small cottage
- Outside garden, fence
- Interaction
- Watering
- Cutting
- Picking fruit/flowers
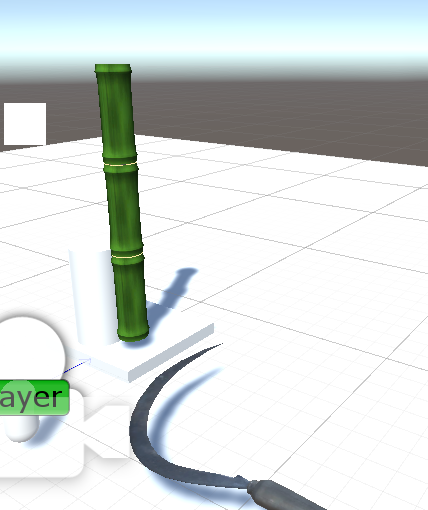
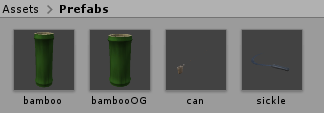
- Growing bamboo
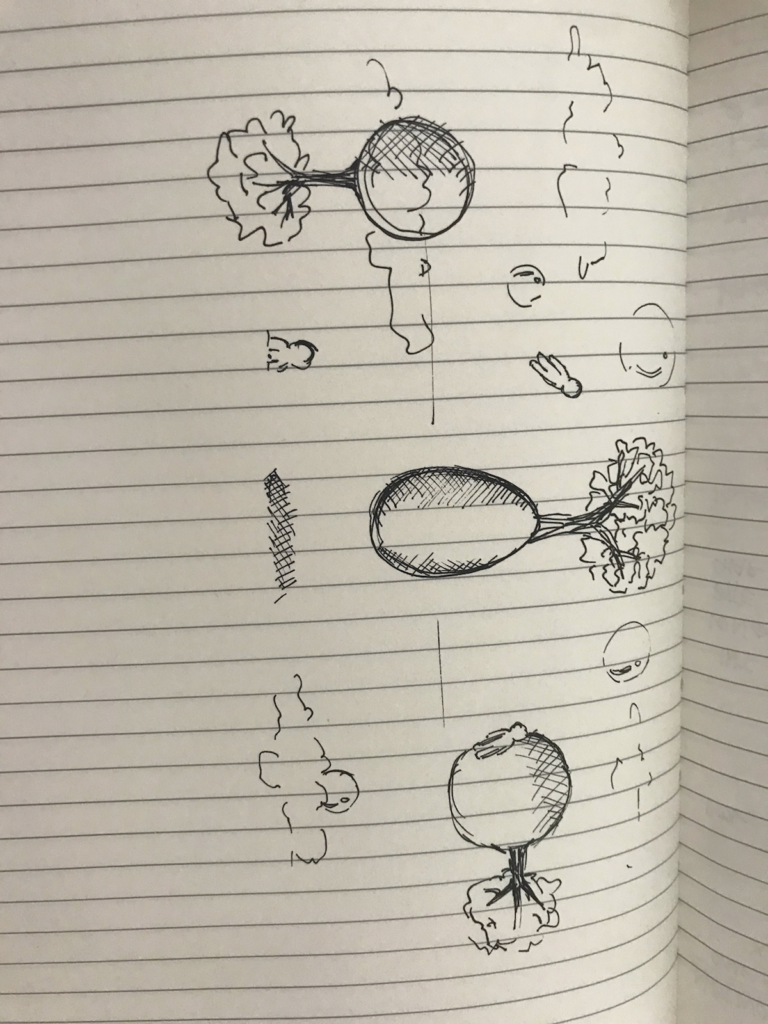
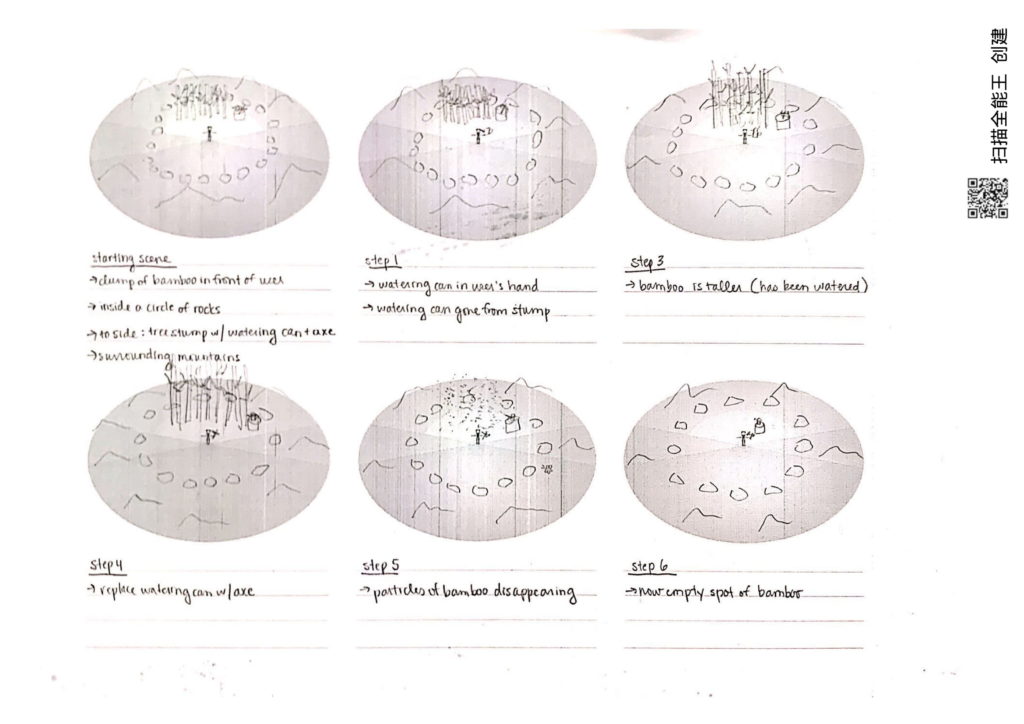
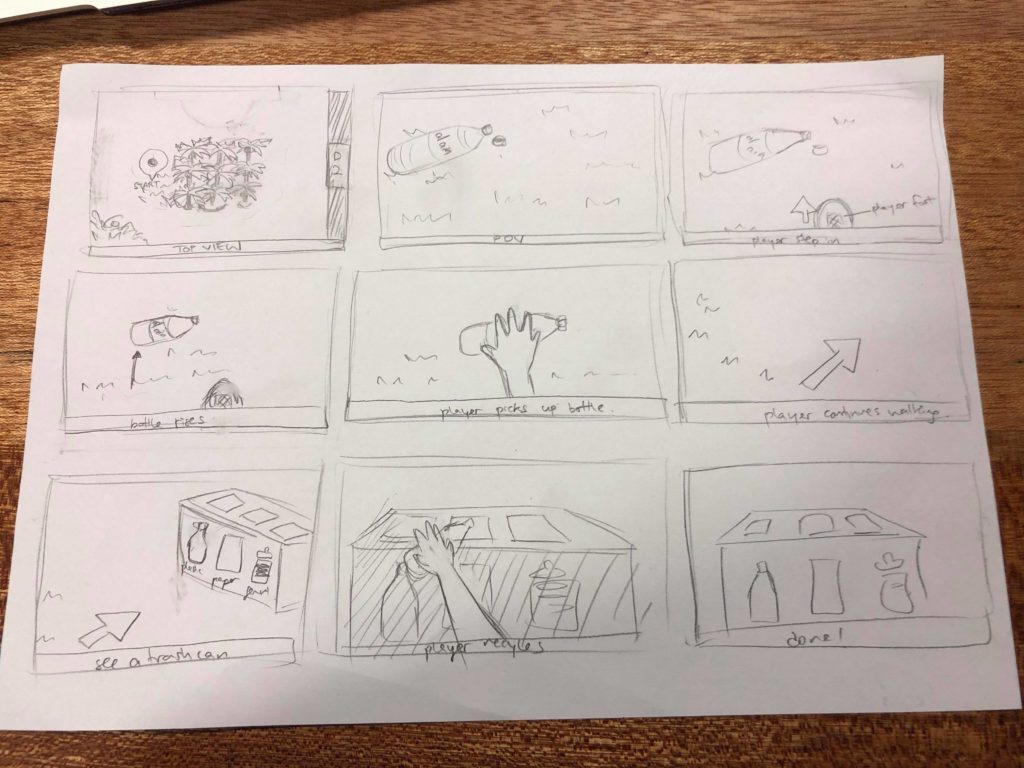
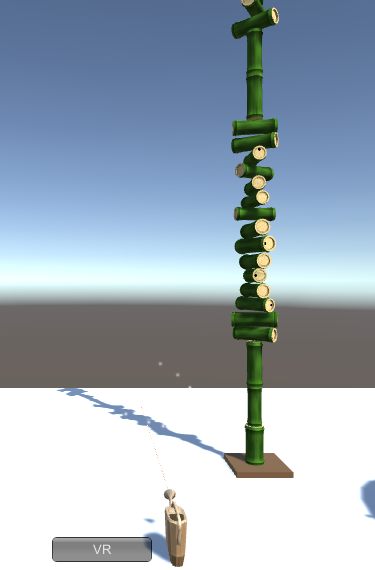
With a solid idea in mind, we went ahead and designed our storyboard:
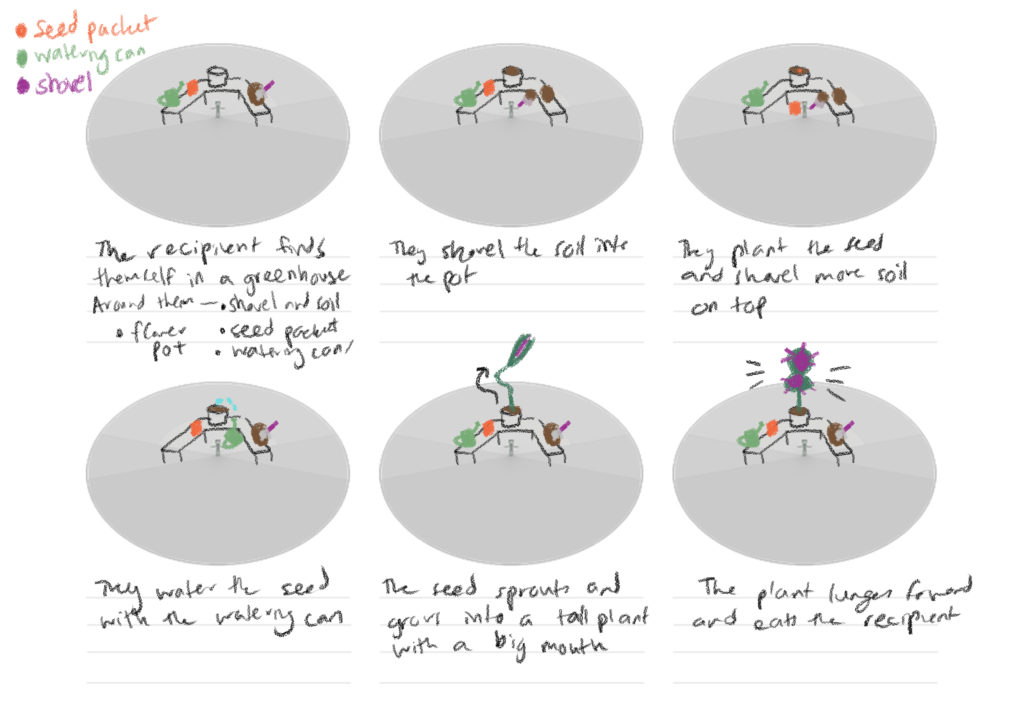
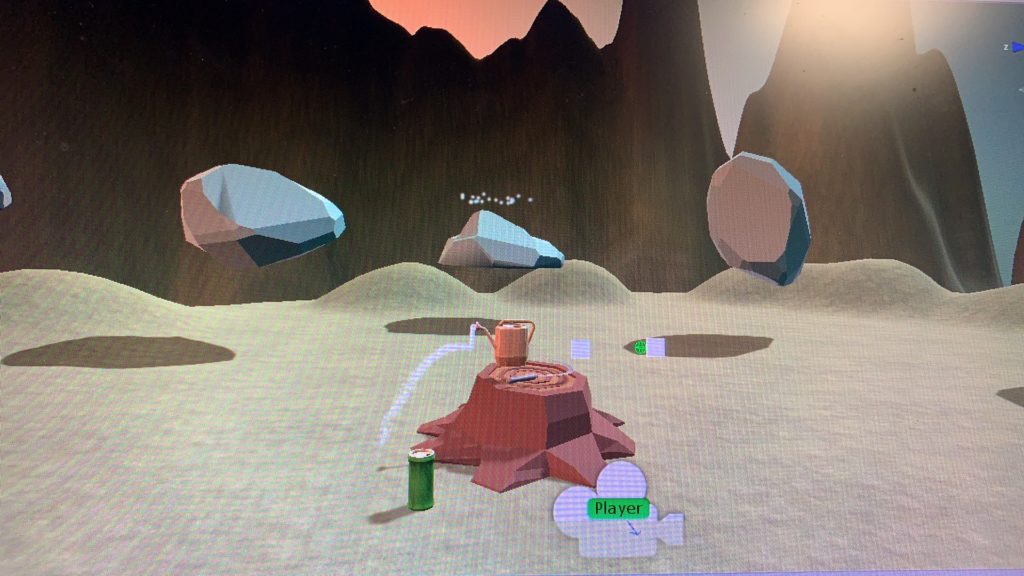
–Step 1–
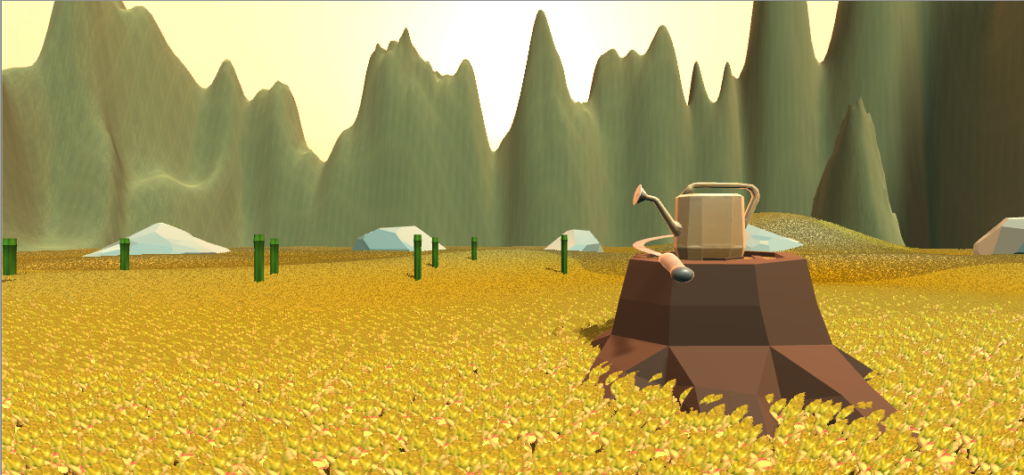
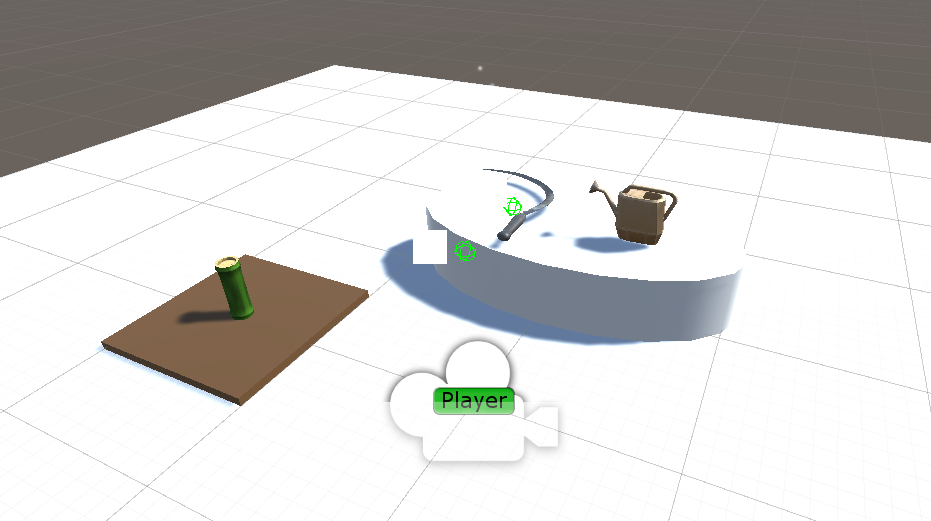
Clump of bamboo in front of you
To your side: tree stump with watering can + cutting tool
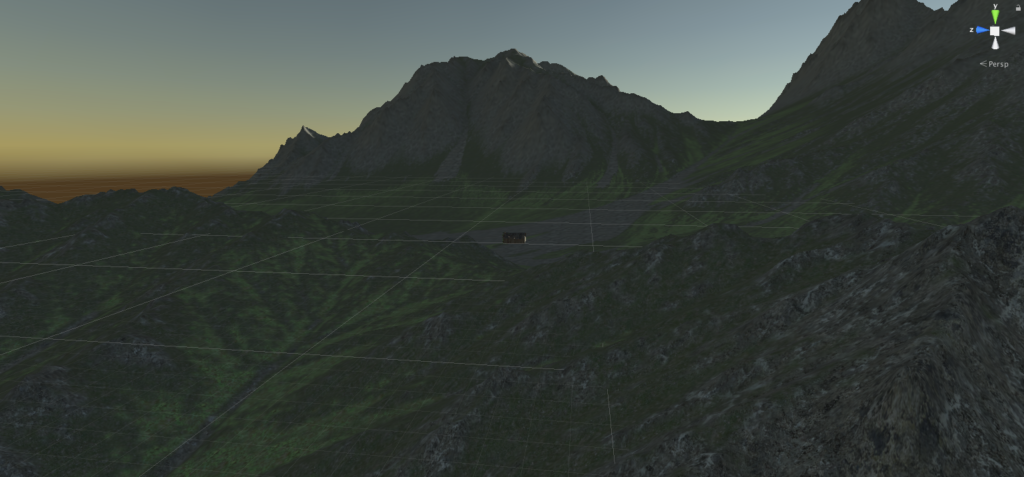
Surrounding mountains and other bamboo
You’re inside a circle of rocks
Butterflies are flying around
It’s golden hour
–Step 2–
You have the water picked up
Water is gone from stump
–Step 3–
Bamboo is taller
–Step 4–
Replace water with axe
Now the water is back on the stump and the axe is gone
–Step 5–
Show the particles of the bamboo disappearing
–Step 6–
Now an empty spot of bamboo
Our storyboard:
Mar 10
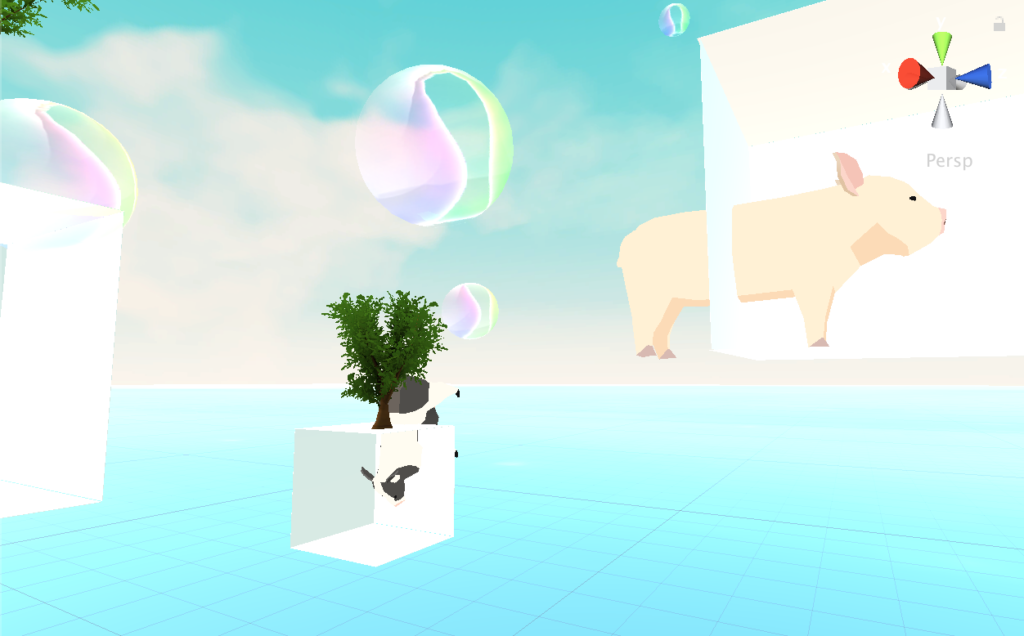
Start to work on the particle system – create the effect of the water coming out of water can when user grab it and pour towards the bamboos.
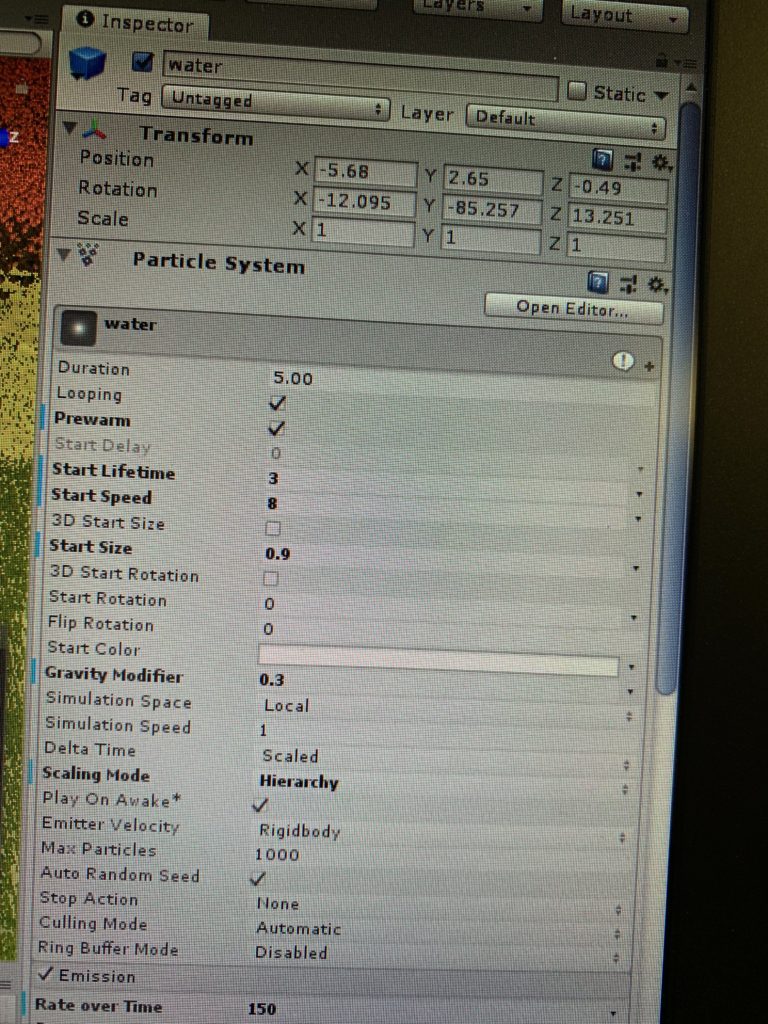
In order to make the water fro watering can realistic, I changed the following parameters: start lifetime/ start speed/start size, gravity modifier to 0.3, hierarchy scaling mode. Under the emission box, I changed the
rate over time” into 200, and for the “force over lifetime” I adjusted Y into -3 and applies it into “world” instead of local. For the “rotation by speed”, I changed the angular velocity into 300, because I started it with 100 but that way in the game the speed the water moves will not be able to catch the player moving speed.
Mar 13
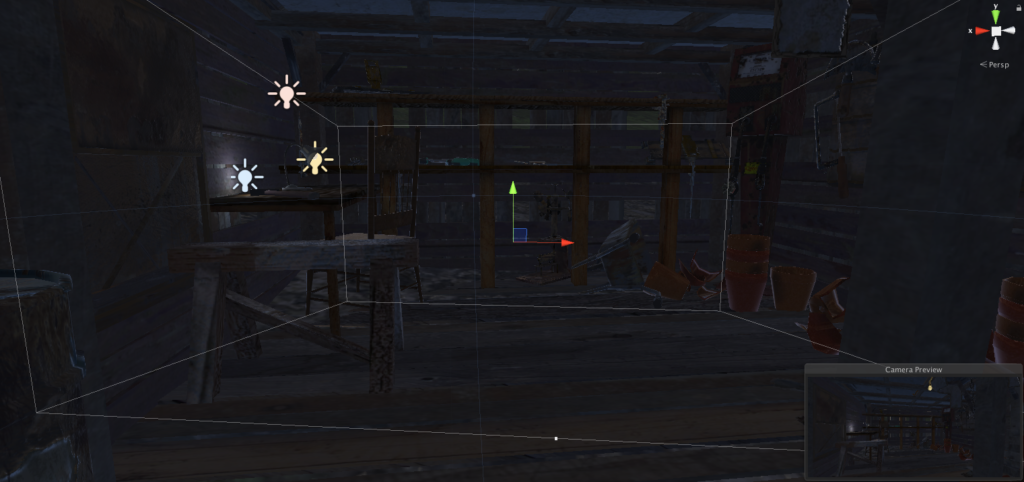
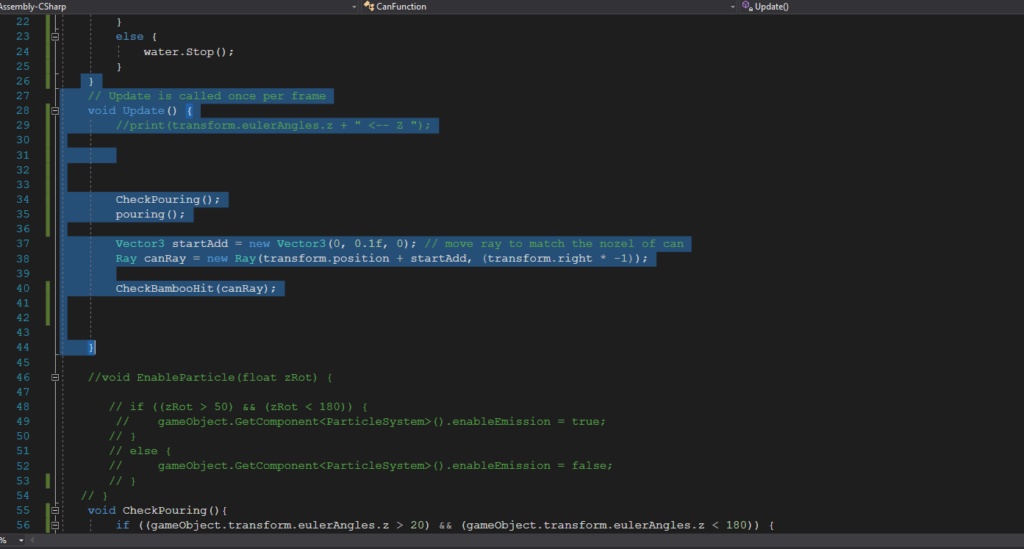
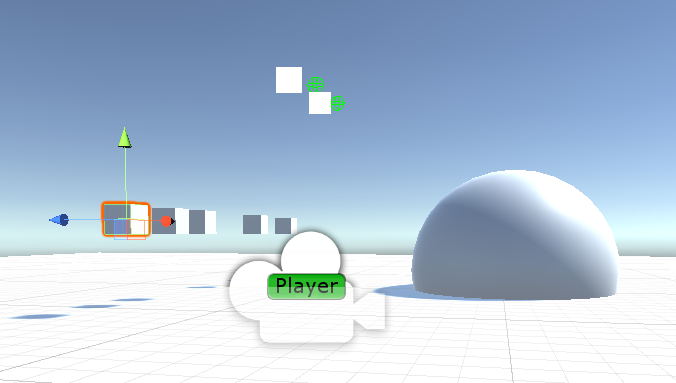
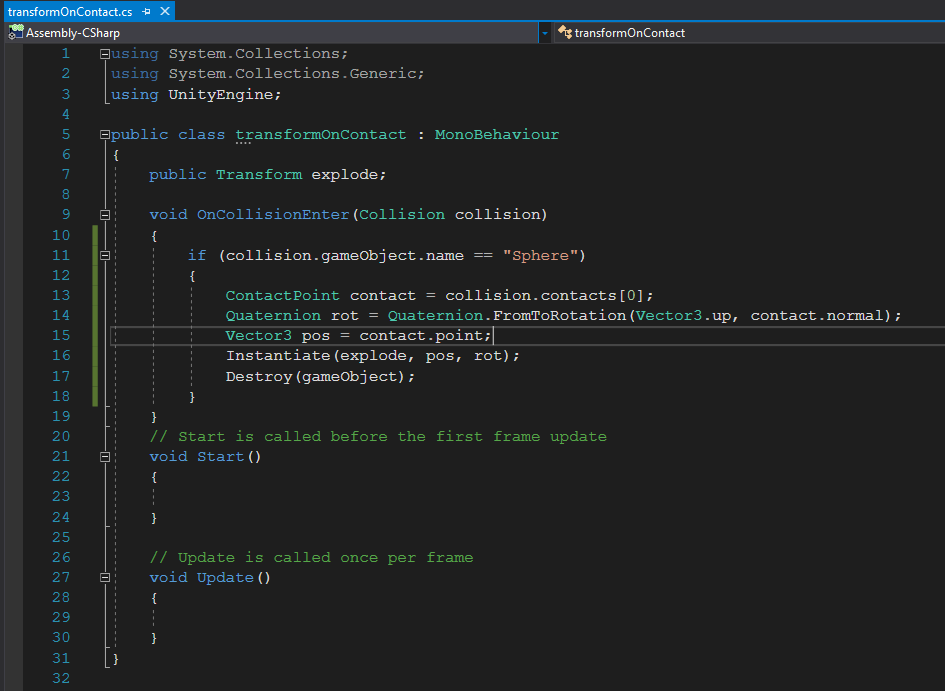
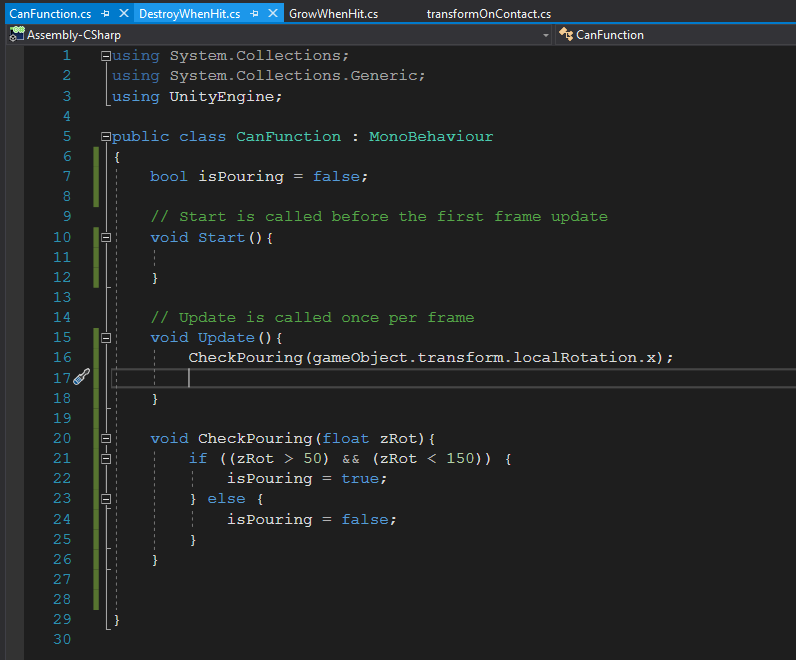
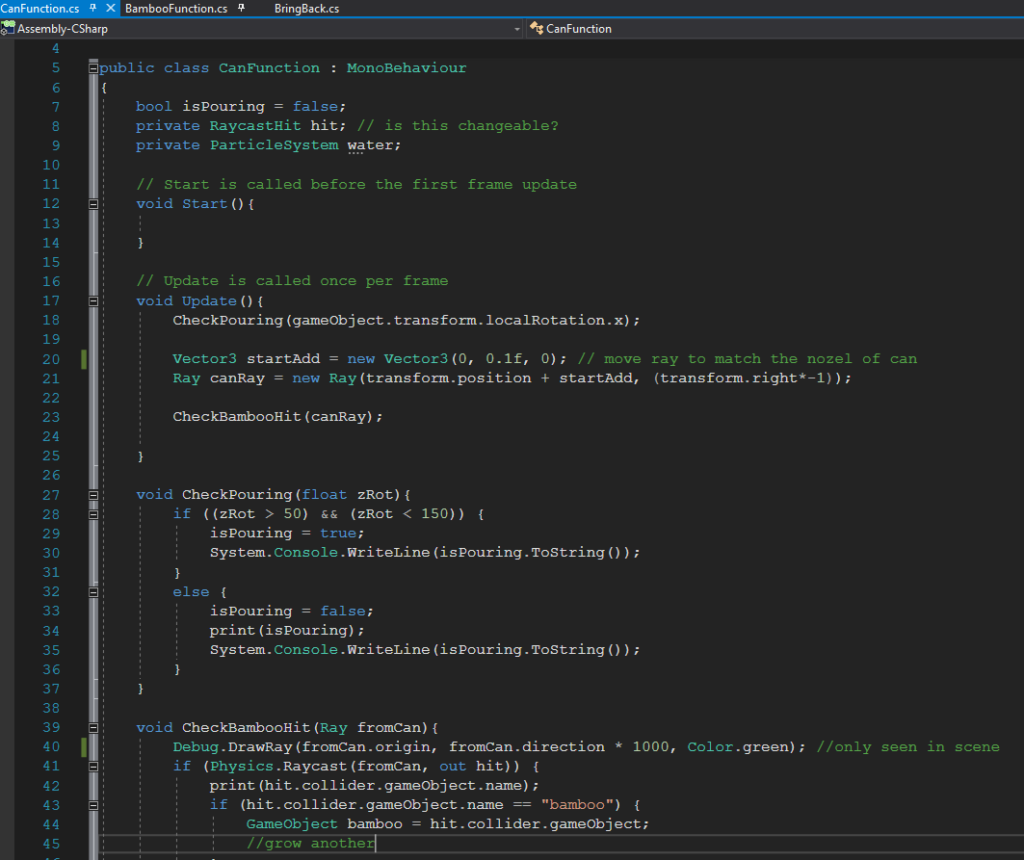
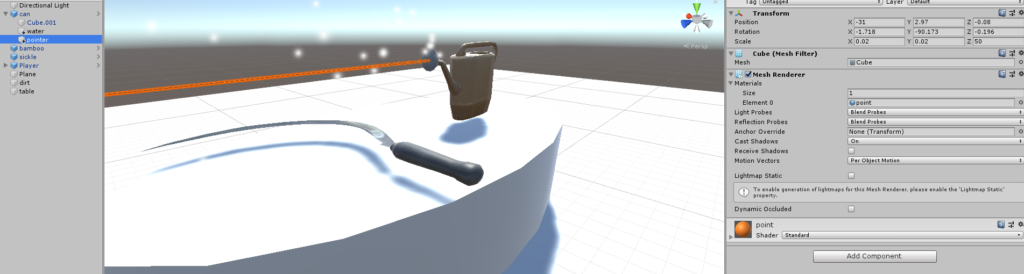
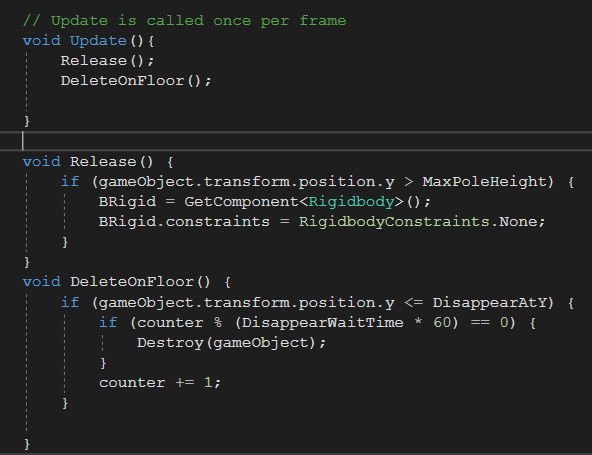
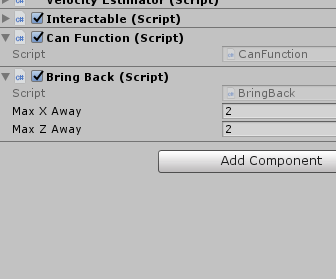
Today I worked on the particle system to make it on/off when an object is rotated at the certain angle – when the watering can face downwards the water particle system will be on and when it’s at the normal position the article system is off and the water effect won’t be shown.
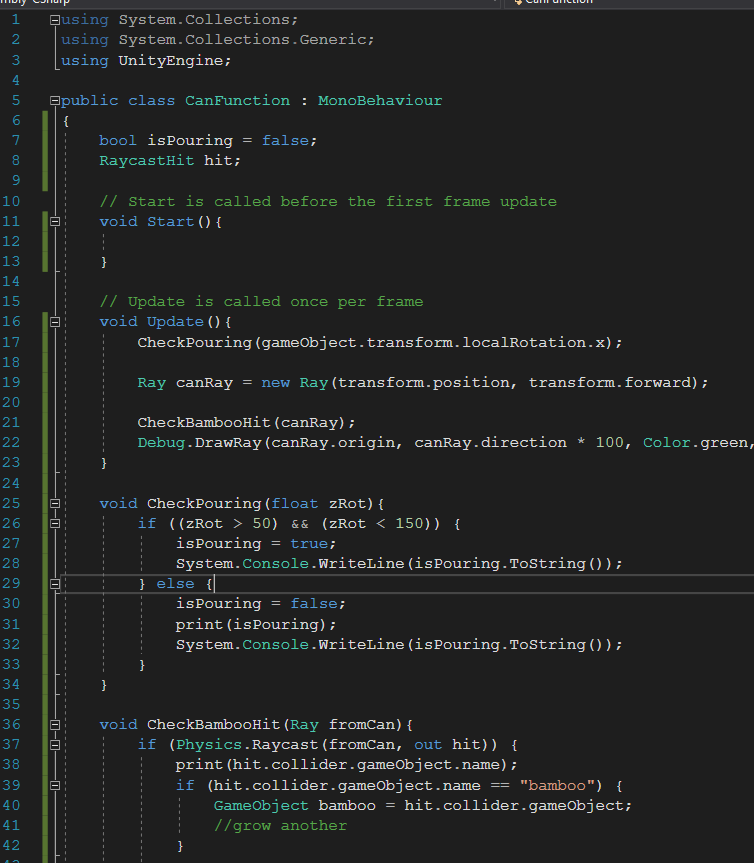
I reached the goal by using the transform.enulerAngles and catching the Z angle input of the water can object. We have a boolean function called “IsPouring”, so I grabbed the particle system under it and I added the code if the angles are beyond the range then the the system stop, else the system play. And we call the function “Is pouring” under the “void update” to make sure it is running all the time.
There was a small problem when I practice the code – the particle system is alway on when it’s playing. So I assumed it was disconnected from its parent object, then I added the code “Print” on the IsPouring function to check if it’s connected to the watering can when the codes are running. It turned out to be that there’s nothing printed out in the console log, so I dragged the the particle system to the water can to make sure it’s under the component section (although the particle system is already a child of the watering can), and then it worked.

Mar 15&16
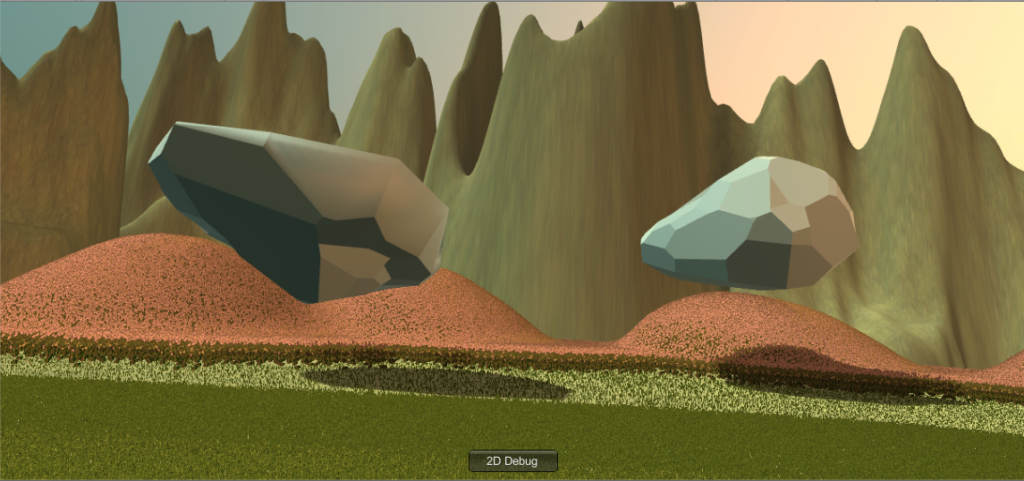
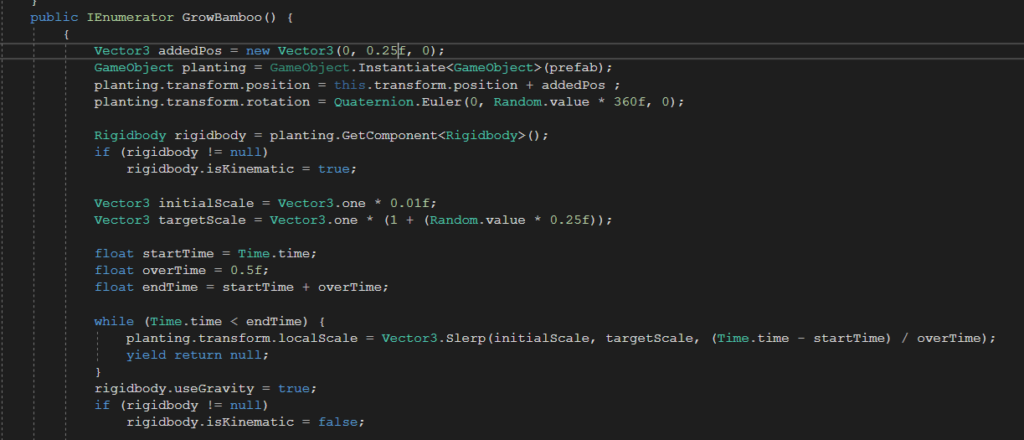
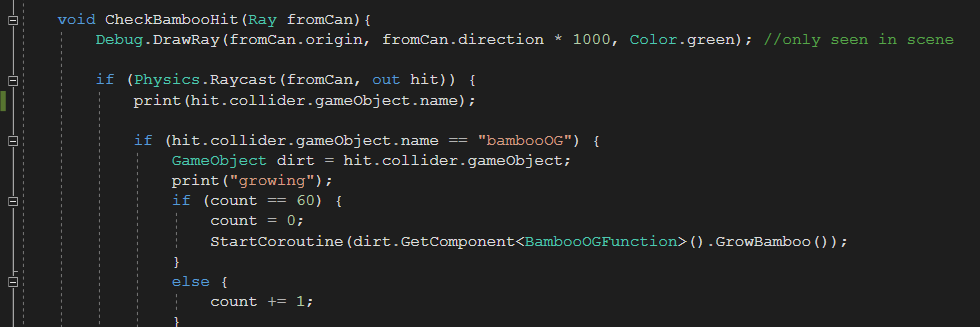
Today I’m working on the interaction code that when the particle system is pointing at the bamboo the bamboo will grow (instead of grow when being pointed by the point ray); the floating effect of the rocks (to create the sense of zen in the environment) .
- The floating rocks effect:
In order to improve the user experience and create the sense of ZEN, I added the floating effect:
I simply just grabbed a floating up and down code from unity community:
public float amplitude; //Set in Inspectorpublic float speed; //Set in Inspectorpublic float tempVal;public Vector3 tempPos;void Start (){tempVal = transform.position.y;}void Update (){tempPos.y = tempVal + amplitude * Mathf.Sin (speed * Time.time);transform.position = tempPos;}
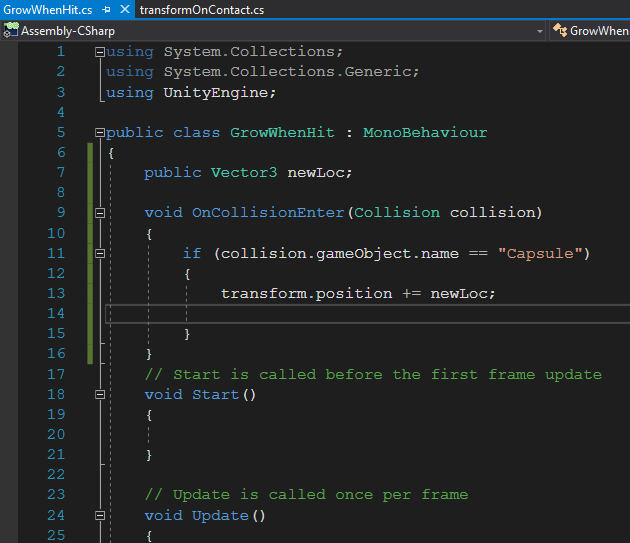
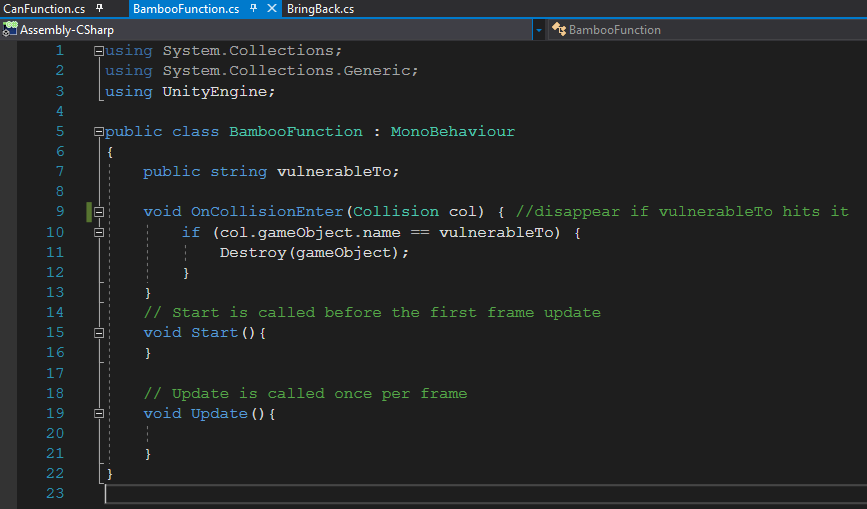
2.Bamboo Grow when been pointed by particle system:
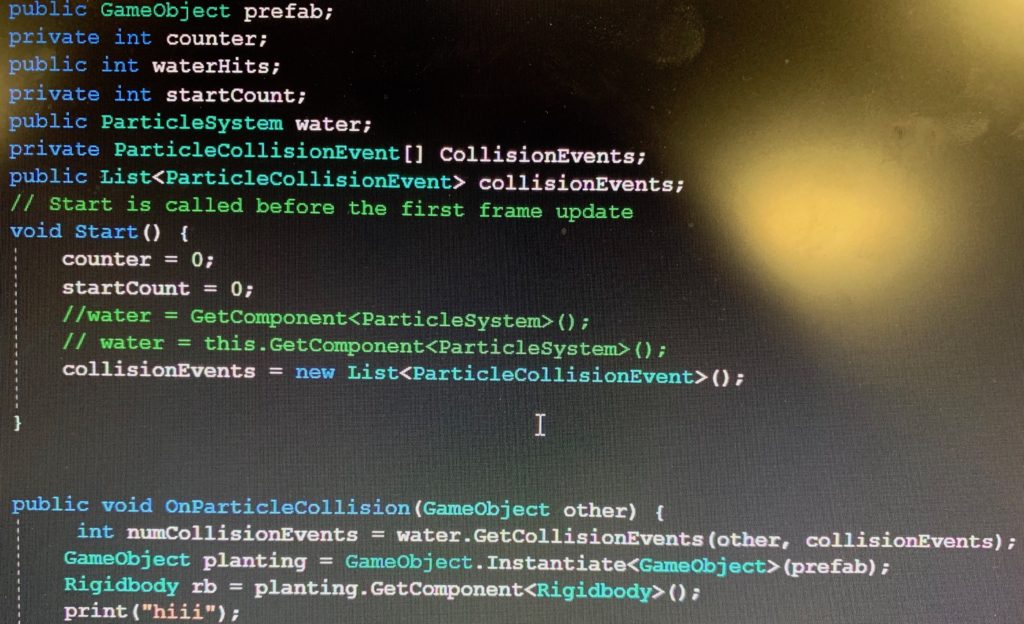
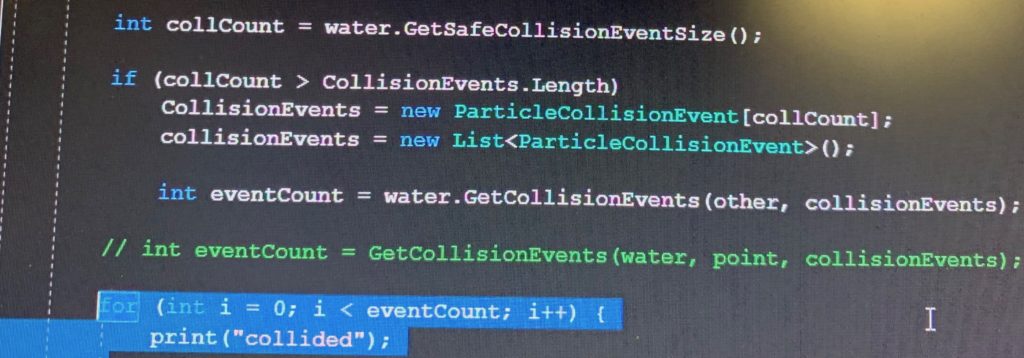
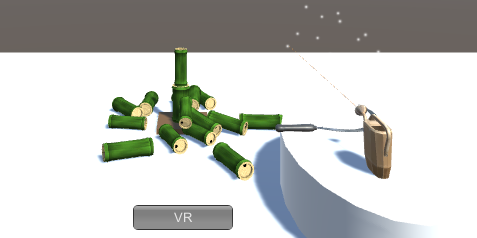
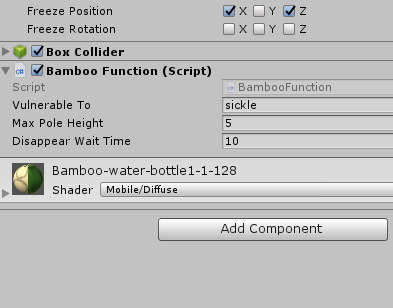
We finished this part by using OnParticleCollision to detect the collision between the bamboo and the particle system that has been attached to the watering can. In the beginning we decided to add the particle system collision detect in the Bamboo OG script, because the growing function is in the same script so it’ll be easier to call, however, even been put into different layers and been set as “only collide with bamboo”, the particle system will literally collide with everything. Then we tried to only write the particle collision detection code in the canfunction and call the bamboo grow function from a different script to make sure the two parts are not messed up with each other. So basically in the particle system we say once it’s collide with bamboo, then it triggers the grow function from the BambooOG script, and then it worked. The codes we uses are shown below:
Mar 17
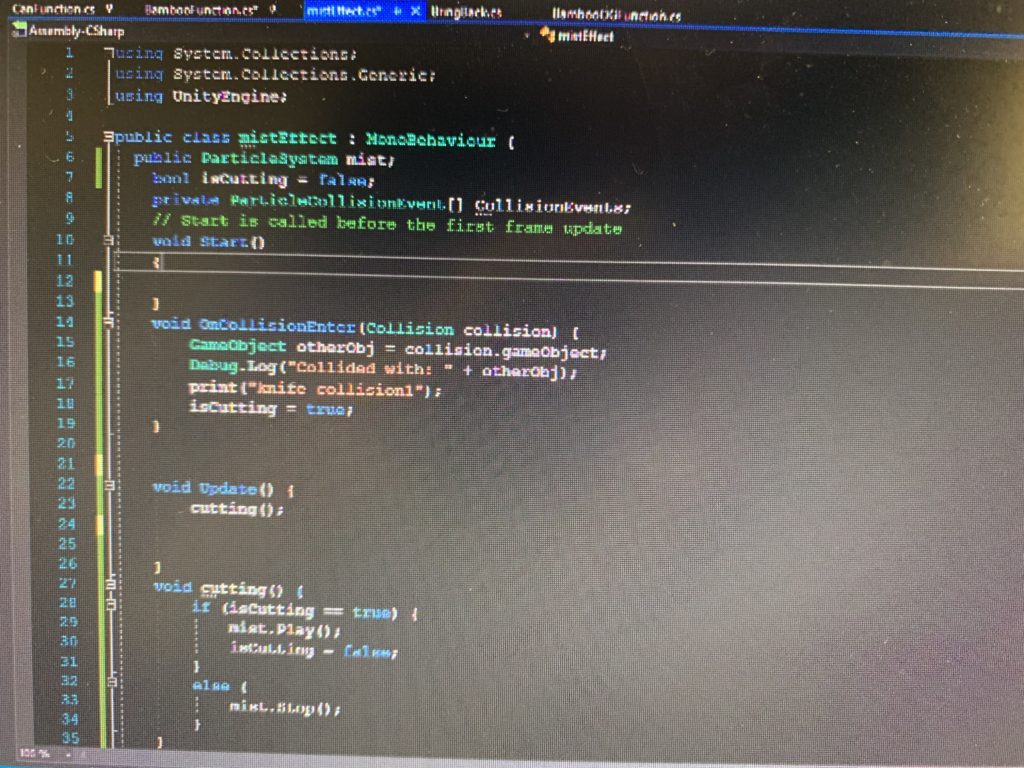
Today I worked on the the mist effect and it will only be triggered when the sickle is cutting/colliding with the bamboo.
At first I was thinking about attaching the particle system (the mist) to the bamboo script, so whenever it is detected that the bamboo is colliding with the sickle (the sickle is hitting the bamboo ), the result of which is to destroy a GameObject (a piece of bamboo), the mist particle system will be triggered to play. However, this design has two significant difficulties: one is that OnParticleCollision is really hard to be repositioned in the “instantiate” to make the mist effect only be shown on the specific piece of bamboo that is hit by the sickle (since there will be a lot of bamboo grow out of the OG bamboo); another difficulty is that since at the same time the game object will be destroyed will the child function on it has been trigger, they effect will not be shown at all because the moment it’s triggered, its parent also dies so the mist has nothing to show on.
Taking these conditions into consideration, I tried to created a new mist script just for the sickle and it’s separated from the bamboo function so we don’t have to reposition the particle system for each specific bamboo. At first I tried to detect the dillion of the particle system by “OnParticleCollision”, however it turns out to be super hard to be detected accurately since there are millions of small particles and it almost collide with everything. Therefore I switched to detect the collusion of the sickle – once the collision of the sickle hits a game object, the particle system (mist) that is attached to be sickled will be triggered. The coded are shown below:


/cdn.vox-cdn.com/uploads/chorus_image/image/53577541/Breath_of_the_Wild_Screen_Shot_3_6_17__2.03_PM.1488988717.jpg)