In retrospect, creating and implementing the interactions for this project was definitely a worthwhile experience. Learning to teach yourself a new software is definitely a realistic expectation of someone’s professional career and this project provided an excellent testing ground for such expectation. However, there where several unexpected mishaps that intervened with the project’s complete fruition as well as major moments of success and I will explain such in the following paragraphs.
SteamVR
SteamVR repertoire of scripts and prefabs allowed me to implement the grabbing of the glasses really easily. However, my initial approach to create the change of camera blurr was to modify the scripts that came with SteamVR. However, this scripts are overly complicated and not easily readable which resulted in me just messing up this interaction in my efforts of implementing additional functionalities to the game.
Another problem that occured whenever I was working on my project was that Steamvr stopped working unexpectedly. This was an unexpected bug that forced me to create an entirely new project file, export all files (expect the SteamVR plugin) from my original project to the new project file, and then install and import a new SteamVR plugin into my new project file.
New Scripts
Given the issue with Steam VR and its closed system that doesn’t allow for a modification of its scripts, I decided to create four new scenes with different colors(Atoka’s idea) and glasses. This resulted in a modification of our projects initial idea, as well as a different functionality. The user now has to look for the glasses, and once they find them, they will be transported into an entirely new scene with misplaced glasses located in an entirely new place. The user must now find the glasses in each scene, and then at the end, the will end up in a new scene with corrected vision. In order to change scenes,I used Unity Scene Manager library. I created four sceneswaps scripts and I attached one to each pair of glasses.
using System.Collections;
using System.Collections.Generic;
using UnityEngine;
using UnityEngine.SceneManagement;
public class sceneswap : MonoBehaviour
{
// Start is called before the first frame update
public bool changed;
public string[] scenes = { “Bathroom7Blue”, “scene1”, “Bathroom7Green”, “Bathroom7Red” };
Note: There are four scripts like the one above implemented in my project, each one for each pair of glasses that is linked to a particular scene.
At first, I wanted to modify the Interactable script so that the scene is swapped whenever the game object is attached to the hand. However, even though the change of scene was achieved through this approach, the flow of the code was interfered with which resulted in interfering with the Interactable Hover Events Script (the glasses wouldn’t stop glowing). The approach I implemented in the above mentioned script was to base the scene swap in the position of the glasses. Once the glasses were moved from their original position, the scene will change. I used the Game Objects Z value, but the x or y value would work as well.
Further Improvement
Even though both interactions were achieved, some things could been added in order to fully culminate tha narrative we wanted to achieve. Some sound could have been added by my partners. Also, maybe changing the camera blurr back to normal once the user goes to the last scene would have been excellent as well. All in all, I am really proud of the results of this project and what it came to be.
For our project, we plan on implementing two interactions that makes the user fully delve into our virtual reality world . The first one is the ability to grab the glasses. The second one is to make the camera view blurry. We plan on intertwining both experiences by changing the camera view as the user grabs the glasses. Given the explorative and exciting nature of the project, I volunteered to work on the interactions as I believe this will be an opportunity to learn more about c# scripting for Unity while my partners are interested more in the design of the scene.
March 13, 2018
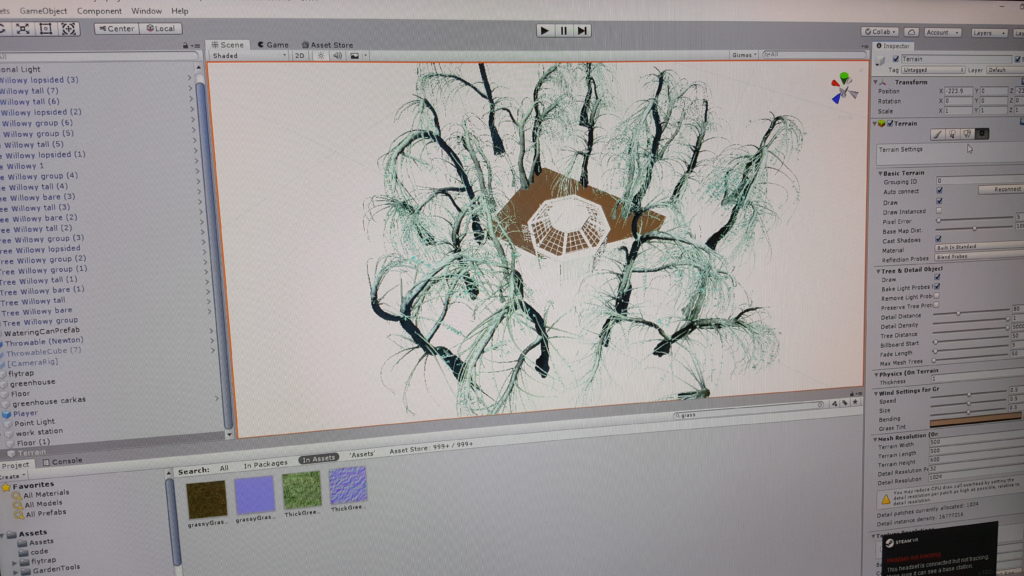
Now that the scene is completed, it is my job to implement the interactions necessary for our project. As I started researching and exploring more about Unity, I concluded that there are two approaches that can be taken to achieve the interactions. The first one is to use the scripts that come with SteamVR’s “Interactions” scene and then build upon them. The second one is to write the scripts from scratch by following tutorials online. I decided that the former is more feasible than the later given the timeframe imposed on us. Therefore, I deleted the camera Object that comes with Unity and I pasted the Player prefab that comes with steamvR into our hierarchy given that SteamVR’s scripts are fully compatible with the SteamVR’s player prefab. I then grabbed the following scripts from Steam VR and included them into my glasses:
Velocity Estimator
Interactable
Interactable Hover Events
Throwable
Scripts borrowed from SteamVR
These scripts gave the glasses a lot of capabilities. First off, they light up whenever they are touched by the controllers. And after they are grabbed, the scripts allow the users to throw the glasses and they are affected by gravity which means that they fall accordingly and interact with floor once they land.
March 15, 2018
After talking with professor Sarah Fay Krom, I am now able to use the post-processing stack that comes with Unity. This will allow me to change the camera view and make it blurry. The post-processing stack generates a script that can then integrated into the camera. This script can be modified through an easy-to-use panel that appears in the hierarchy which allows you to change things like: depth of field, blur, motion blur, color grading, etc.
Post Processing Stack recommendations by Professor Krom
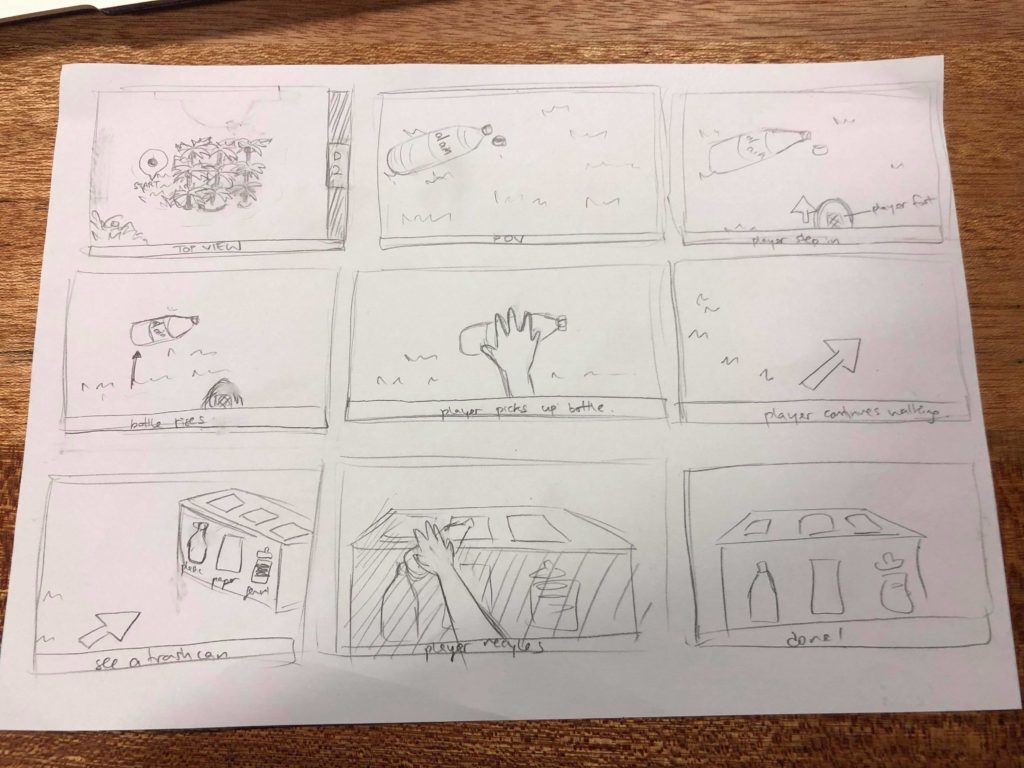
For project #2, our group decided to build an experience that tackles the problem of sustainability on campus. We wanted to base our scene on campus, and there are trash on the ground. In the real world, if someone passes by trash, and ignores it, there are no consequences. Besides, people all have the mind set that someone else will act on that. We wanted to raise people’s awareness of the NYUAD community by creating an alternate reality where if people walks by a piece of trash without picking it up, they will receive negative feedback indicating that they are not acting in a proper way.
Besides, because of the diversity of the community, there isn’t a shared standard for recycling which everyone agrees upon. Always having been such an ignorant person about the environment, I really get confused when I throw an empty Leban bottle: should I put it in general waste or plastics? The bottle is definitely recyclable, but only after I clean the bottle. Recycling can be extremely complicated: I still remember that I was extremely shocked when the RA told us that we should recycle the lid for Starbucks cups but throw the paper cup into general waste. By creating an educational environment which mimics what actually happens on campus, we hope to teach people how to recycle in an entertaining way. Through the repeated interaction within our scene, users might be able to perceive recycling as less burdensome as they get more familiar with it.
Here is our storyboard, drawn by Lauren:
Some initial thoughts and designs:
Since the campus is kinda huge, and we only have limited space for interaction, we decided to limit our scene to the area (the small garden/square) between D2, A6 and the Arts Center. We think that this side is more populated, compared with the ERB side, since everyone comes to D2 for meals, and we can actually see Al Ain bottles and other trash lying on the benches.
In terms of feedback, we decided that when users get close enough to the trash, the trash will light up, indicating that users could interact with the object. When users put the trash into the correct trash bin, they will get a rewarding sound feedback. Otherwise, they will get a sound feedback that is negative, and will not be able to drop the trash into the trash bin.
For the ambience sound, we decided to use birds sound, because we actually have speakers attached to the palm trees on campus that play birds sound. This is not only a recreation of the campus environment, but also a sarcasm of how they try to make an illusion of something that does not exist on campus.
We split the work so that Ju Hee and I will be in charge of making the environment, while Lauren and Simran will be in charge of making the interactions.
During the class where we presented our initial ideas, Sarah suggested that the main focus of this project should be on the interaction. After discussing a bit on the environment, we decided that the scene does not have to be set on campus. I experimented with the environment and found a skybox of a block in Tokyo. Japanese society put a great amount of emphasis on recycling and eco-friendly lifestyle, so I think it make sense to place our interaction in Japan. But when we met again in class, we decided that we should still use the campus as our environment, and Lauren became passionate about making the environment, so she switched her task with mine.
Ju Hee and Lauren have built the environment, and our scene looks like this:
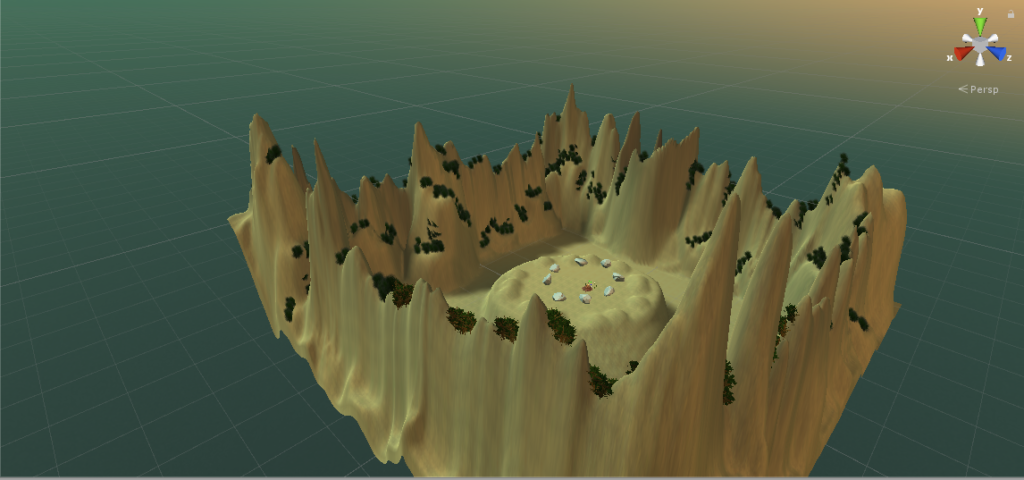
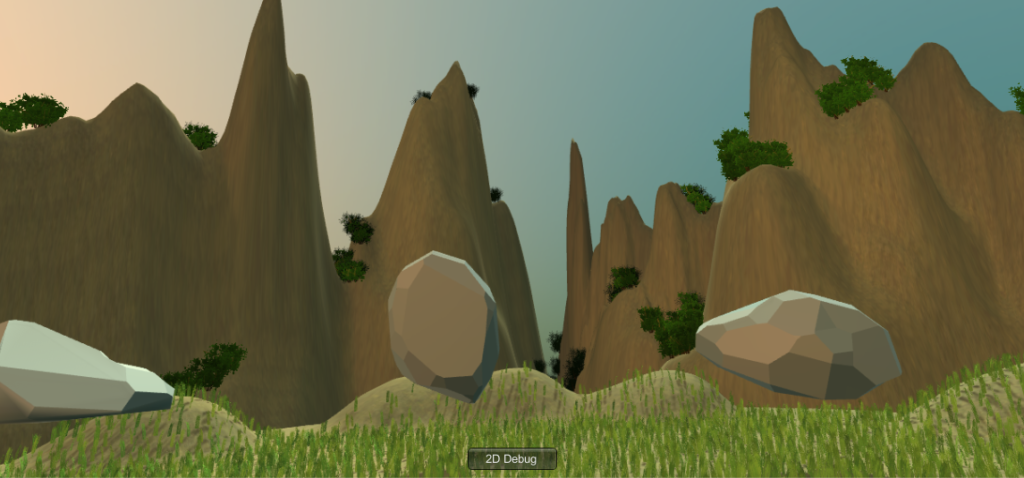
Zenboo is a relaxing space that demonstrates the state of ZEN by giving user relaxing watering&growing&cutting bamboo activities to offer them a chance to interact with mother nature in a fun way. A user will be surrounded by mountains, floating rocks and bamboo clumps, he/she will find tools nearby to give the user hints to initiate some activities with them. In Zenboo, the user is able to water the bamboo using a watering can and watch it grow in a unique way; moreover, he/she can also play with the newly grown bamboo. When picking up the sickle next to the watering can, a user can wave it to the bamboo clump and make the bamboo pieces disappear. If the use water it to much and make bamboo grow too fast, due to the effect of gravity, some piece of bamboo will fall on the ground and disappear after few seconds by themselves as well!
Space viewUser view
2. Process and Implementation:
This is how we started:
How did we build the scene and the the ideation of designing choices:
We want to create a scene/space that makes people feel relax in and doesn’t have a lot of things/movement to distract them from feeling the sense of “Zen”, therefore we came up with the idea of having a giant mountainous background with the sunset mode and put the user in the middle, also in order to amplify the interactions between the user and the growing plants experience, we put rocks around where the user is standing to make sure he/she won’t have to move too much to interact with the environment.
The reason for this inspiration is they are very mystical and calming, which would help contribute to the relaxation aspect of Zenboo.
The design of the circle of rocks was decided through the user feedback that the rocks could be larger and floating around the user rather than the initial plan to have them resting on the ground. This turned out to have a pretty cool effect and create the Zen atmosphere.
Another design decision that has been changed during the project development was the location of the bamboo. Since space is a limitation, having the clump of bamboo in front of the user all spaced out would have been problematic, or perhaps not as intuitive that the user had to go over to it and water it. Instead, we decided to place the bamboo in a semi-circle close to and around the user. This way, the user does not have to walk very much in order to water all of the bamboo.
What would be the “everyday” thing in this world?
The simple actions/interactions like pick up/drop/throw/watering and cut that everybody already knows what to do the first time they see the scene. And according to out existing knowledge we have the perception that when you water the plant it will grow, when you wave the sickle it will cut the plant. Therefore there’s not a lot of education of how this project works is needed and it’s easy for any user to take it up.
Steps to implement the interactions:(highlight some key interactions I worked on)
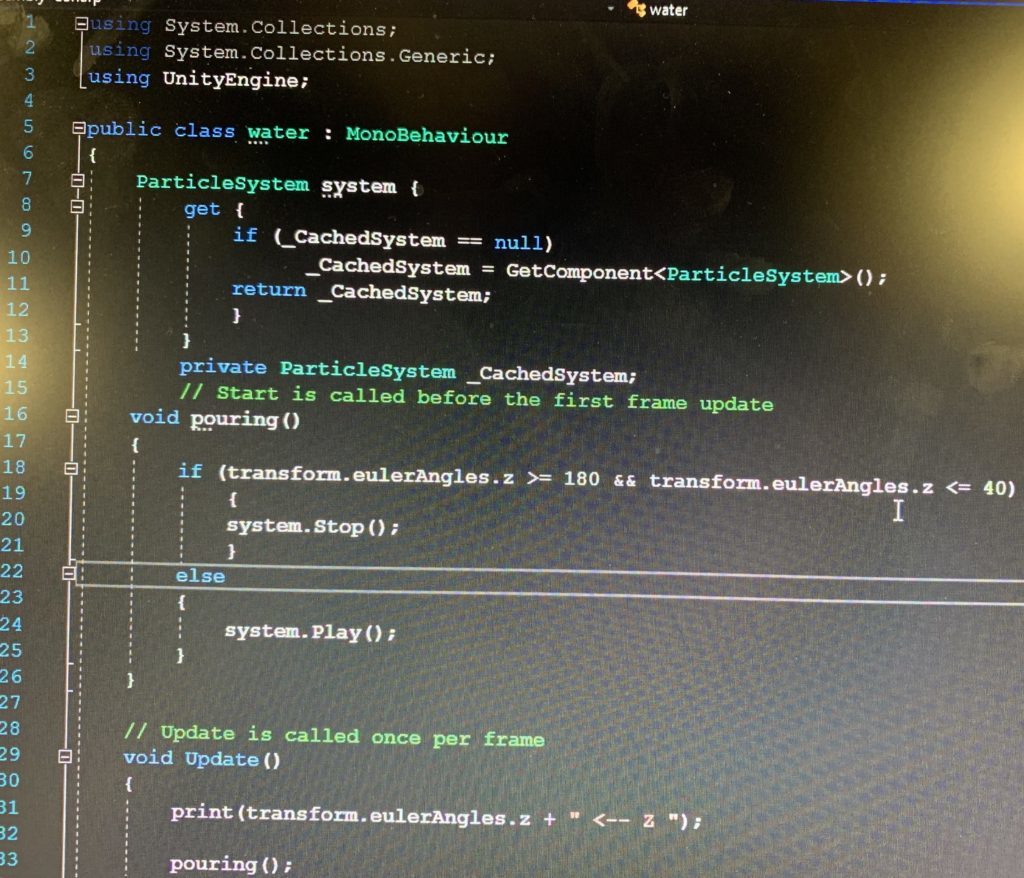
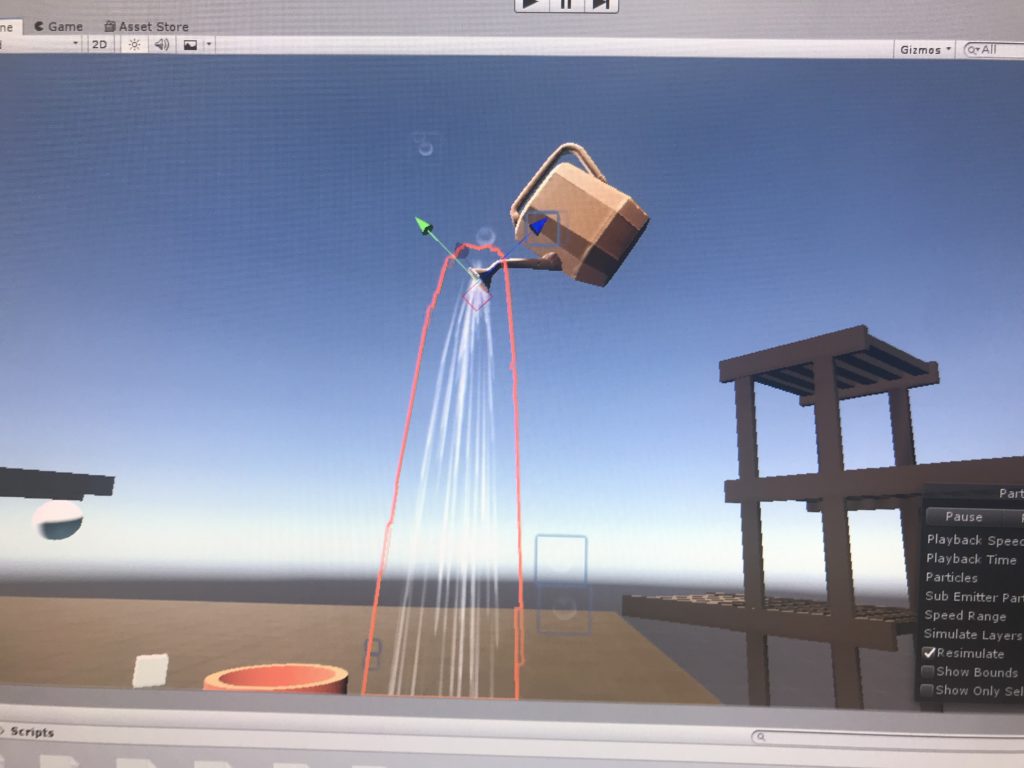
1: Particle system – water:
I worked on the particle system to make it on/off when an object is rotated at the certain angle – when the watering can face downwards the water particle system will be on and when it’s at the normal position the article system is off and the water effect won’t be shown.
I reached the goal by using the transform.enulerAngles and catching the Z angle input of the water can object. We have a boolean function called “IsPouring”, so I grabbed the particle system under it and I added the code if the angles are beyond the range then the the system stop, else the system play. And we call the function “Is pouring” under the “void update” to make sure it is running all the time.
There was a small problem when I practice the code – the particle system is alway on when it’s playing. So I assumed it was disconnected from its parent object, then I added the code “Print” on the IsPouring function to check if it’s connected to the watering can when the codes are running. It turned out to be that there’s nothing printed out in the console log, so I dragged the the particle system to the water can to make sure it’s under the component section (although the particle system is already a child of the watering can), and then it worked.
2: Particle system – mist:
Another particle system I worked on is the the mist effect and it will only be triggered when the sickle is cutting/colliding with the bamboo.
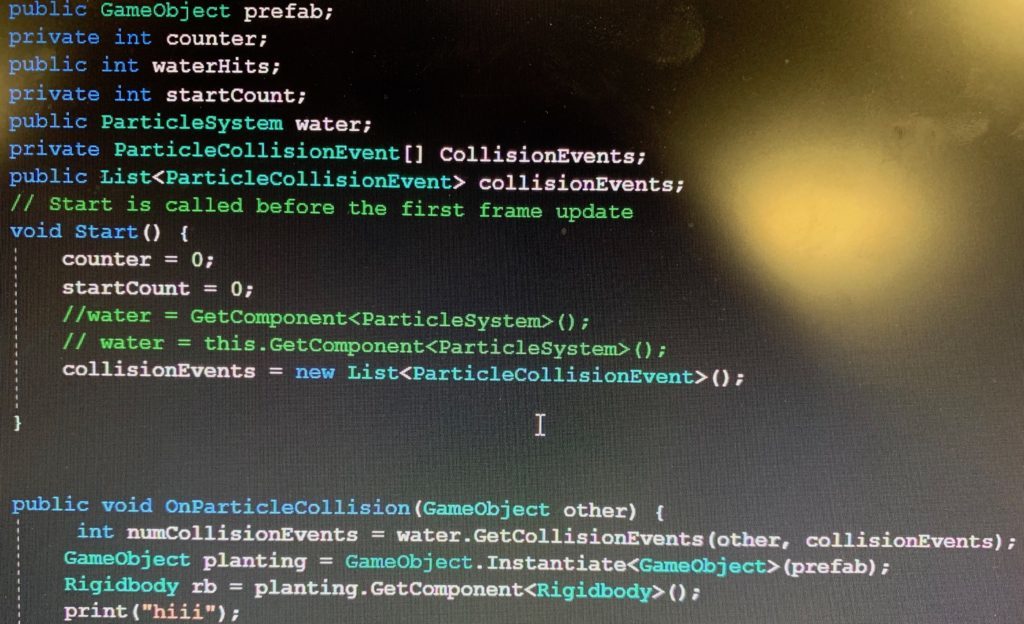
At first I was thinking about attaching the particle system (the mist) to the bamboo script, so whenever it is detected that the bamboo is colliding with the sickle (the sickle is hitting the bamboo ), the result of which is to destroy a GameObject (a piece of bamboo), the mist particle system will be triggered to play. However, this design has two significant difficulties: one is that OnParticleCollision is really hard to be repositioned in the “instantiate” to make the mist effect only be shown on the specific piece of bamboo that is hit by the sickle (since there will be a lot of bamboo grow out of the OG bamboo); another difficulty is that since at the same time the game object will be destroyed will the child function on it has been trigger, they effect will not be shown at all because the moment it’s triggered, its parent also dies so the mist has nothing to show on.
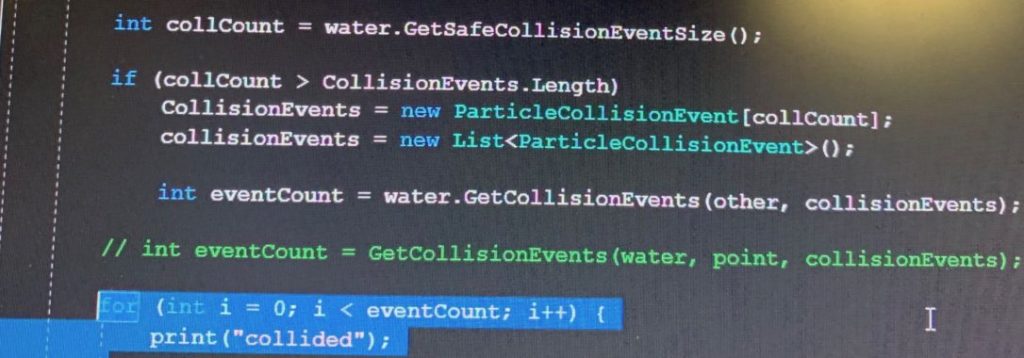
Taking these conditions into consideration, I tried to created a new mist script just for the sickle and it’s separated from the bamboo function so we don’t have to reposition the particle system for each specific bamboo. At first I tried to detect the dillion of the particle system by “OnParticleCollision”, however it turns out to be super hard to be detected accurately since there are millions of small particles and it almost collide with everything. Therefore I switched to detect the collusion of the sickle – once the collision of the sickle hits a game object, the particle system (mist) that is attached to be sickled will be triggered.
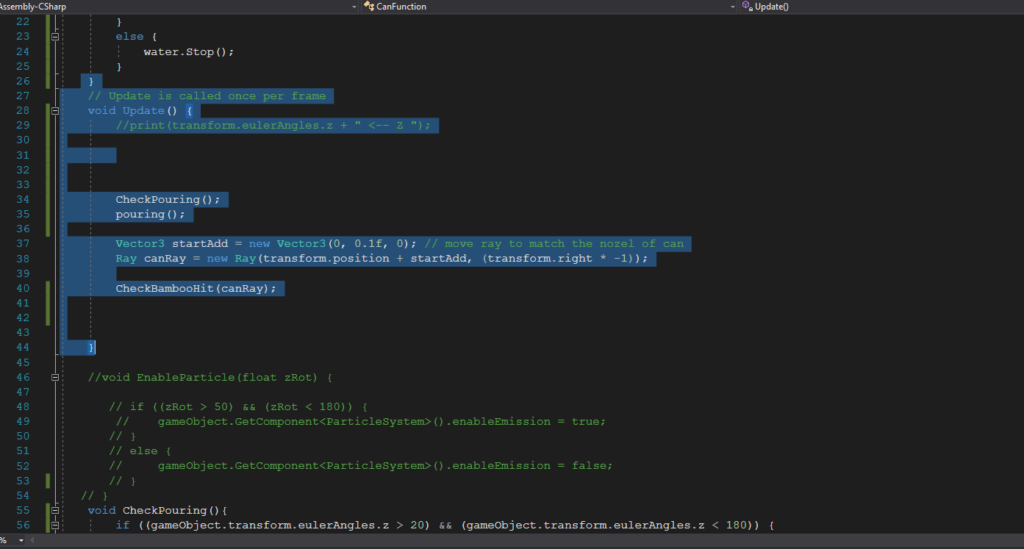
3:Bamboo Grow when been pointed by particle system
We finished this part by using OnParticleCollision to detect the collision between the bamboo and the particle system that has been attached to the watering can. In the beginning we decided to add the particle system collision detect in the Bamboo OG script, because the growing function is in the same script so it’ll be easier to call, however, even been put into different layers and been set as “only collide with bamboo”, the particle system will literally collide with everything. Then we tried to only write the particle collision detection code in the canfunction and call the bamboo grow function from a different script to make sure the two parts are not messed up with each other. So basically in the particle system we say once it’s collide with bamboo, then it triggers the grow function from the BambooOG script, and then it worked. The codes we uses are shown below:
4: Floating effect of rocks:
In order to improve the user experience and create the sense of ZEN, I added the floating effect:
3. Reflection/Evaluation: This should discuss your expectations and goals in the context of the what you felt was achieved with the finished piece.
I think we as a team successfully achieved our initial goals and expectations of this project – that we have a beautiful Zen environment, we built the growing and cutting bamboo interactions, and surprisingly during the process of coding bamboo functions we found a cool way to let the bamboo has the same X and Z position, so even if the user play around the bamboo/lift it up/touch it, the bamboos will come back to the same position. We also achieved our initial thought of limiting the user’s movement – by putting the semi-circle bamboos in front of the users. For the coding part I was involved in particularly, I reached the initial expectation to make the particle systems, trigger the bamboo grow function when it is collides with the water particle system, create the floating rocks effect and create the mist effect when the sickle collides with other game objects.
However, there are something that needs to be reconsidered/improved in this project. In out initial thought, we design the circle of rocks to limit the user’s movement, but it turns out to be in the real VR scene those rocks just become a part of the distant backgrounds that didn’t really work to limit the user’s movement. What’s more, I think there should be an ending of our project – because what we have now is just to endlessly water and cut the bamboos, it should stop or have something else to show at some point. The parts that I could potentially work more on includes making the collision detection more discreet – for example, the mist particle system will only be triggered when specifically collides with bamboo, not with any game objects.
Finalizing the topic of having a greenhouse housing a carnivorous plant
find what assets are available to us to use;
skybox; cloudy sunny day
greenhouse victorian style
strange looking plants and trees
Venus fly trap plant; animated
gardening tools
water particles
some animals
cage
rocks
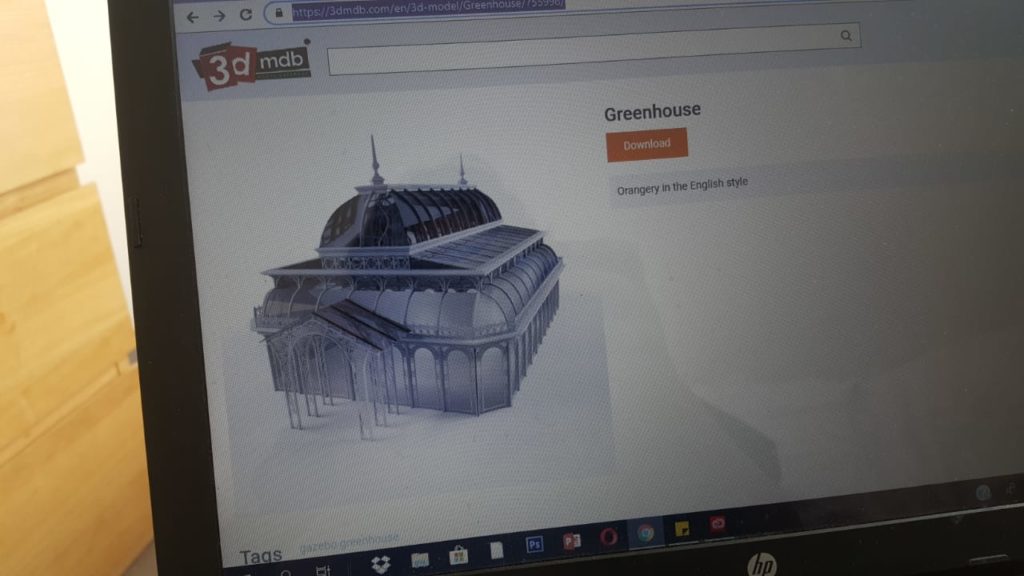
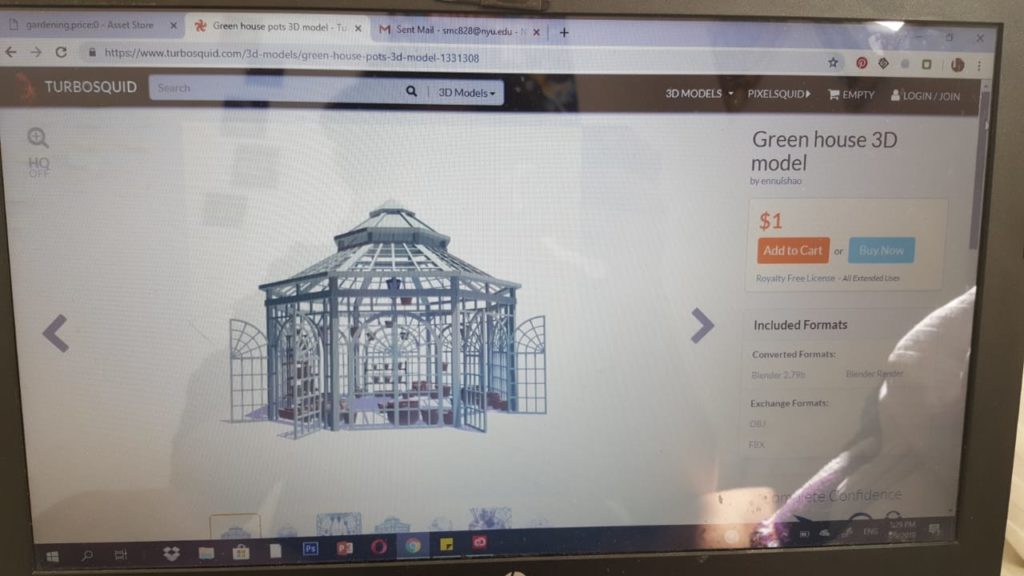
settled for the Green House 3D model; and it came with pots and a planting station inside!
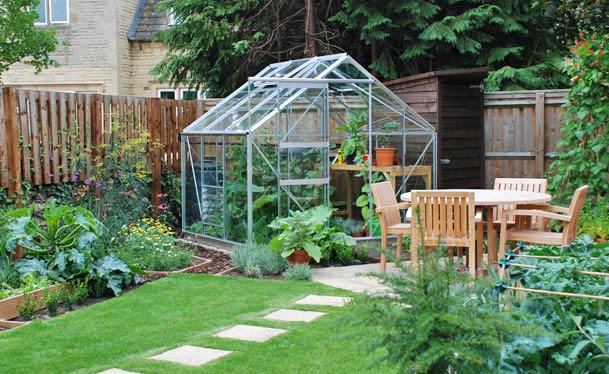
At first I imagined the greenhouse to be set in someones backyard with maybe a fence enclosing the garden and pots arranged in an organized order. but having a greenhouse in the middle of a forrest gave more of an adventurous feeling and lively environment by being surrounded by huge trees and a stretch of what feels like an infinite land
Watering Can
how to have the watering can when tilted pours water
playing around with the rain water prefab to have an angle to it and looks less like rain and more like water coming from a watering can
removed the bubbles that come out of the water prefab
removed the puddle it creates at the bottom
found out you can change the image of the rain drops to something more suited
realized we need to place the water particles at the exit point when the can is tilted and not straight
figuring out how the console will recognize the tilt of the controller to specify an angle the player must hold it for the can to activate the water particles
Inside the Greenhouse design
should the plants be placed at random
should the plants be placed at patches of dirt
should they be organized in pots
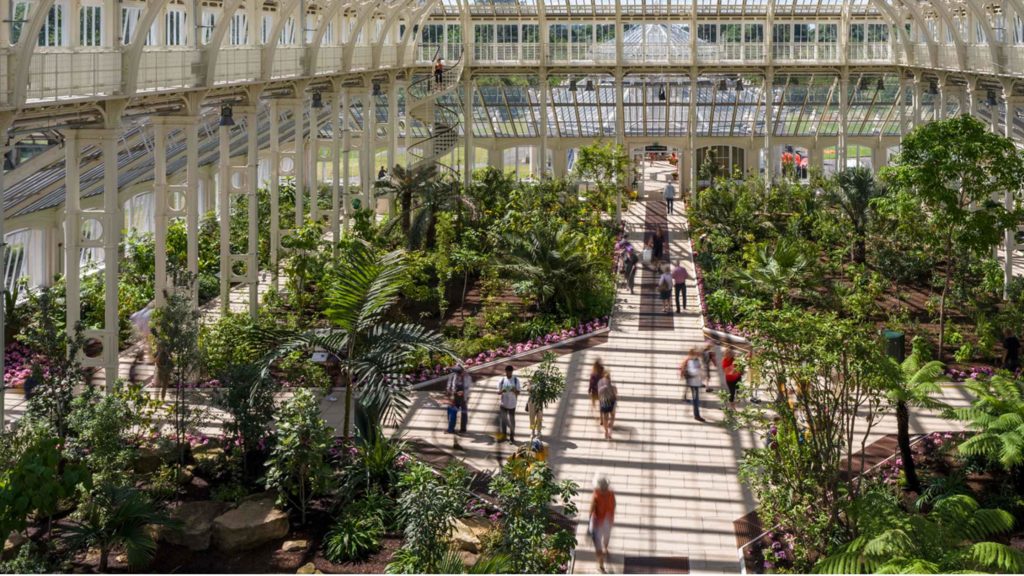
Final inspiration; Kew Gardens in London
Other animations?
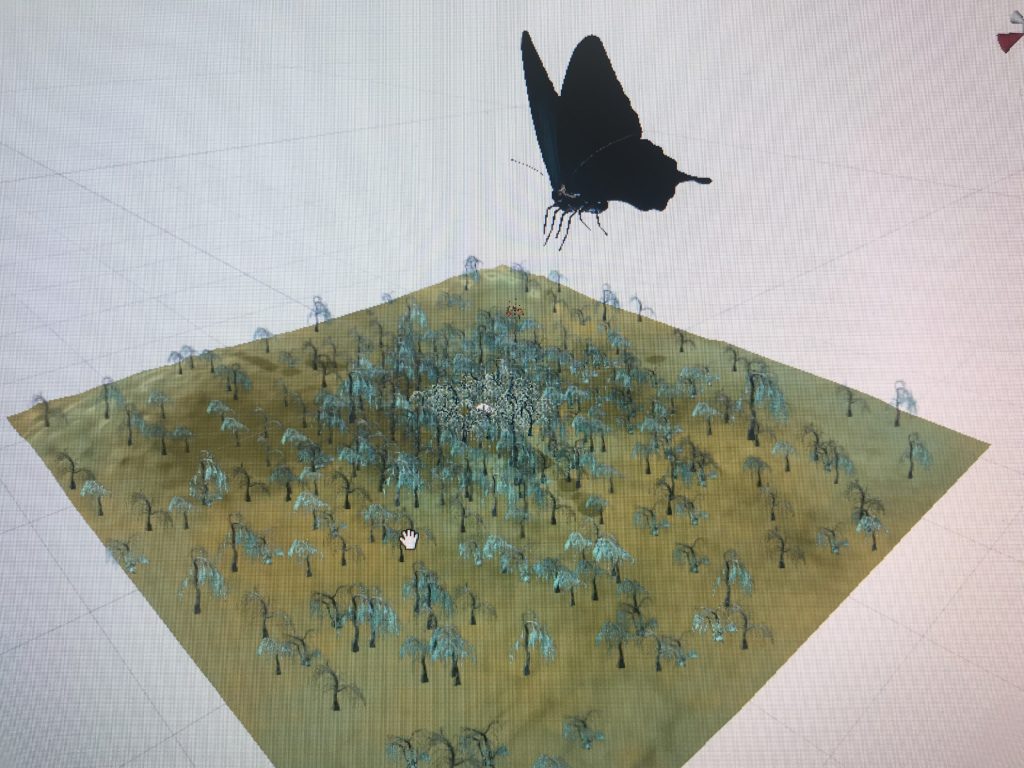
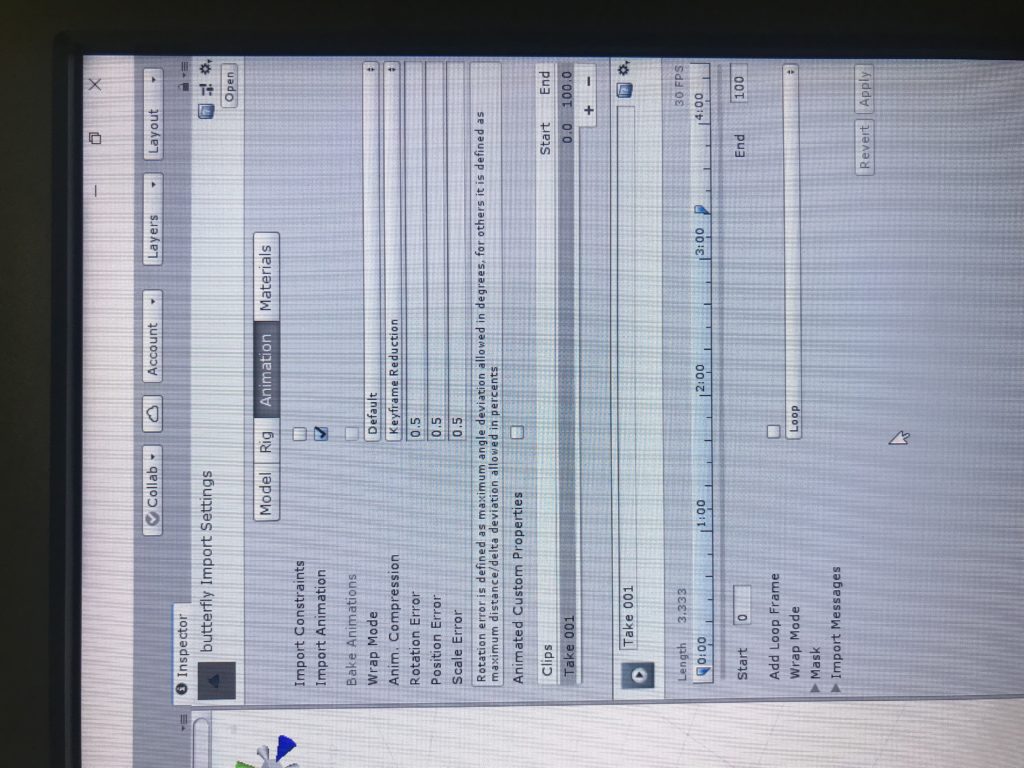
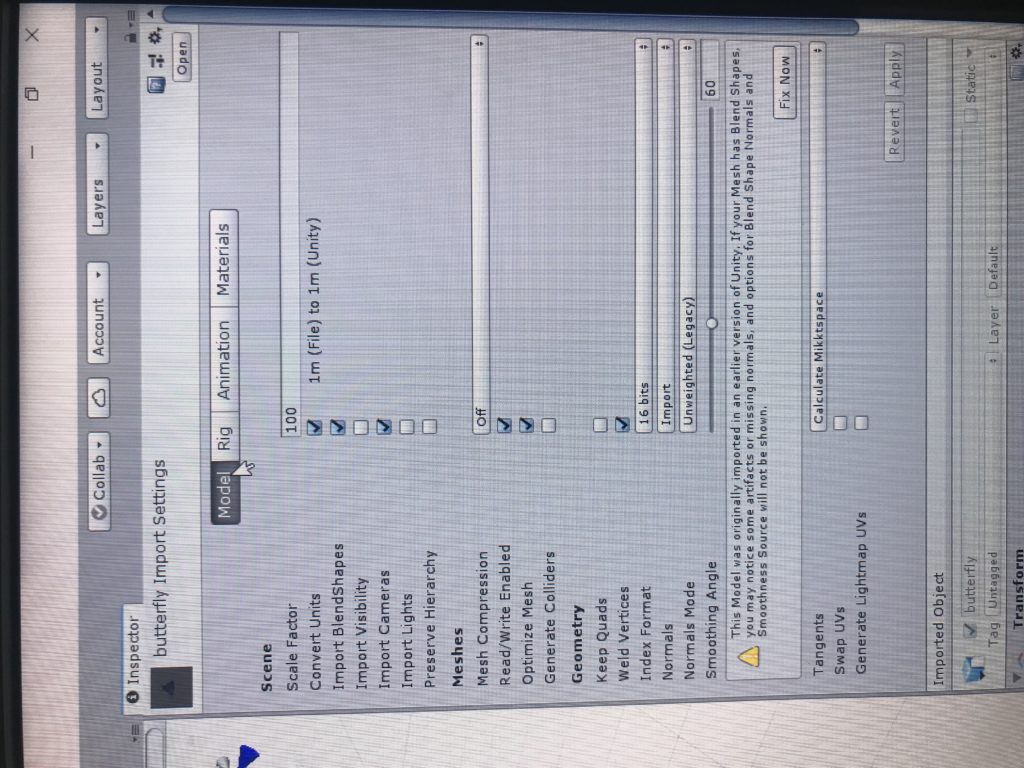
add a Butterly; but make it huge
enemy plants package has several animations to choose from
working with the Butterly and its animations took a while; at first I made it large but when the animation would start playing it would shrink back to its original size
to fix that problem, I had to change the scale factor of the animation to a larger digit to keep the size of the butterfly the same even when it starts animating
if we get the important parts done; what else do we want to include?
alien hands
maybe the sound of running water and animals outside the greenhouse
several seeds to choose from
have a button to reset the items to their original location
when grabbing the watering can it still goes through items such as the table and the pot
sound of the forrest and birds
low sound of growling coming from the caged plant to have the user look back
As we first planned the project, we came up with the idea of building an experience where the user can learn more about sorting trash. We wanted it to be not only fun but also a very educational experience.
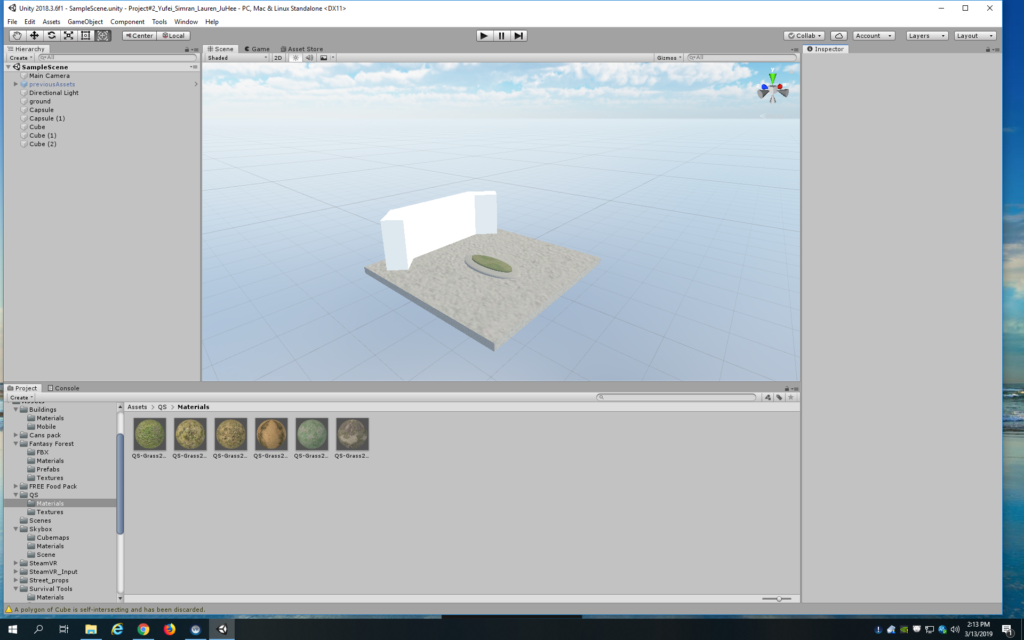
My role in this project was to create the virtual reality space. We first tried using pre-existing skybox of a city. We tried placing three different garbage bins and garbage such as plastic water bottles, cans, glass bottles, tissues, and etc. We found some prefabs that included diff garbages. We placed them around the city. The skybox on its own looked amazing, but as soon as the garbages were placed, something didn’t look right. So we decided to get rid of the city-scape and build our campus from scratch.
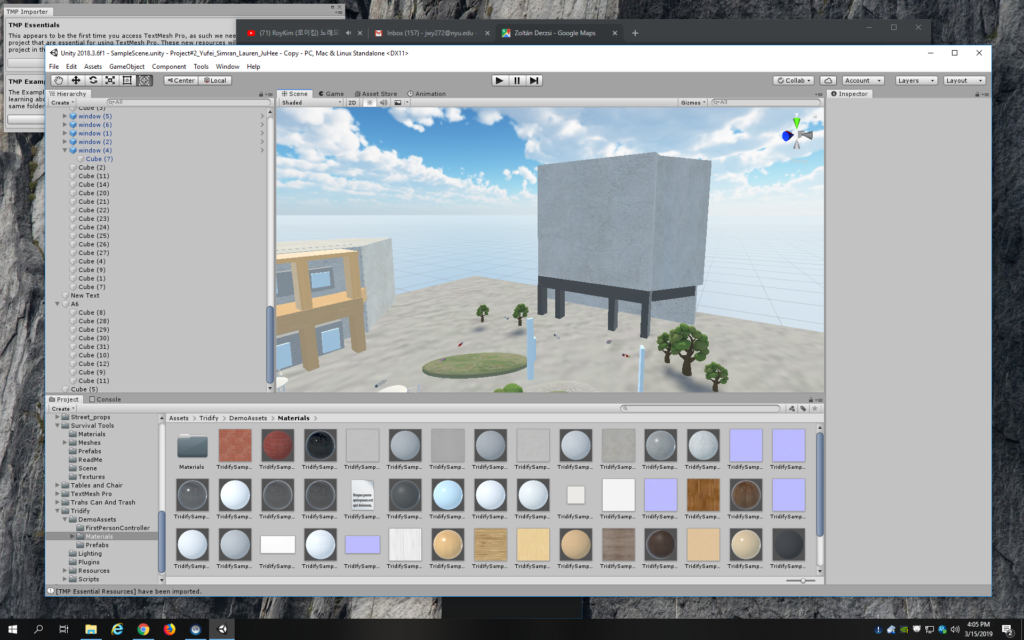
We decided to focus on D2 area. We wanted to build the buildings, create the grass patches. We added trees. We also added the seating areas in front of the dining hall where people usually eat. This is the first draft of our environment and the reference image of our campus.
At this stage, we had one main building in the center (dining hall) and mostly grass patches. Some trash were added as seen. However, there was another issue. We wanted to make sure all three sides were enclosed so that the user would not have to face the issue of not knowing where the environment ends.
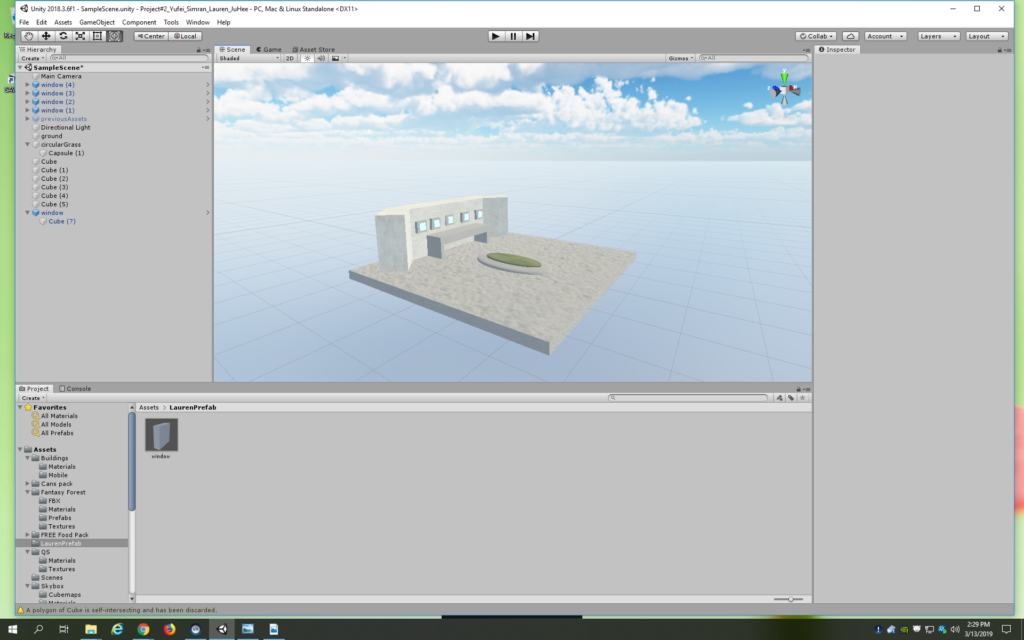
Later we added two more buildings on the each side of dining hall.
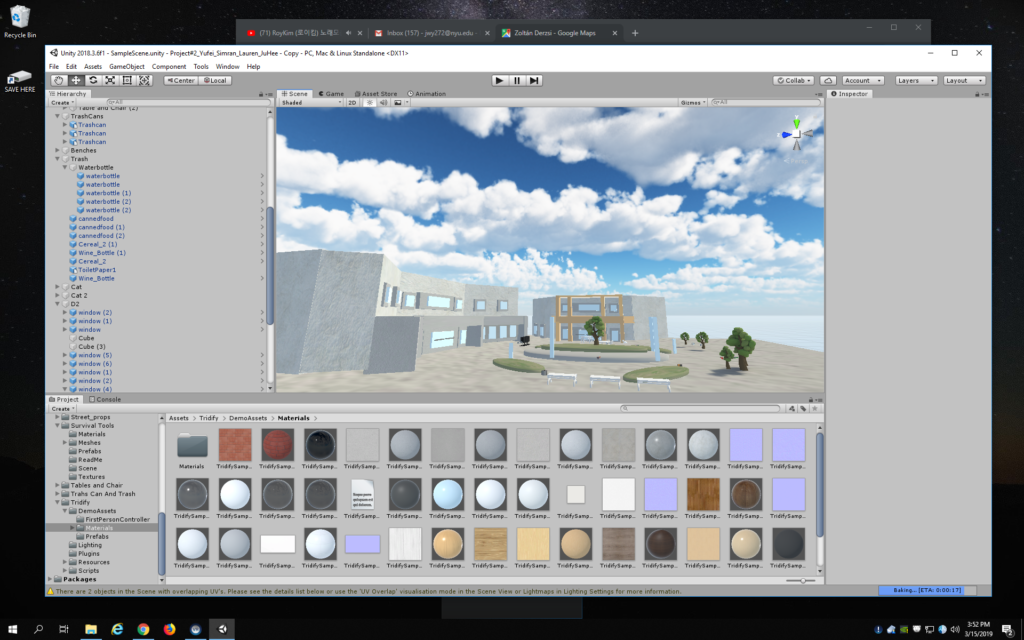
The environment part of the project was completed. Now we only have to focus on the interactive part of the project.
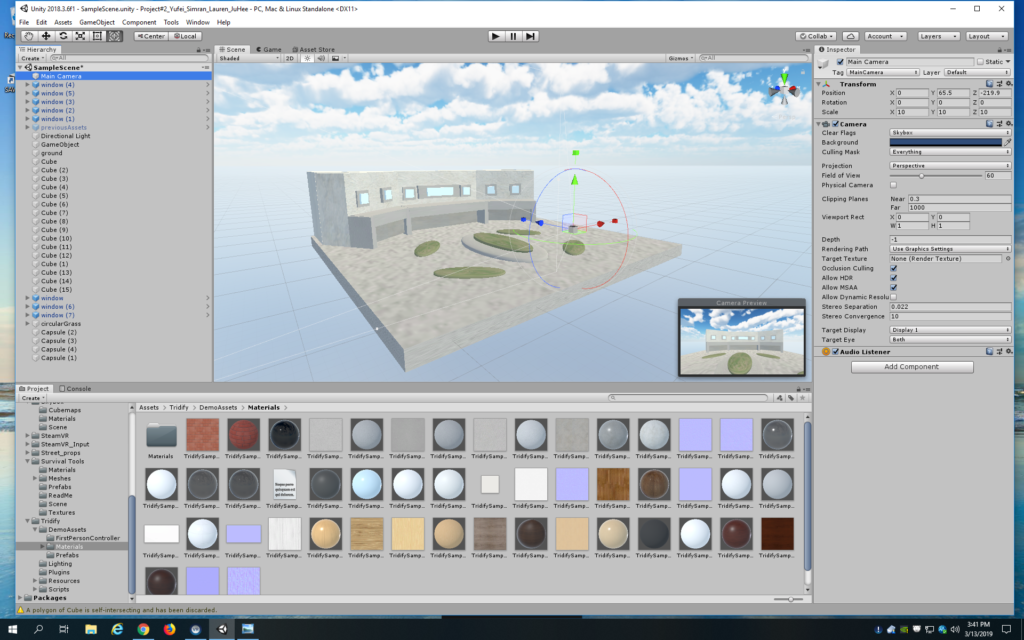
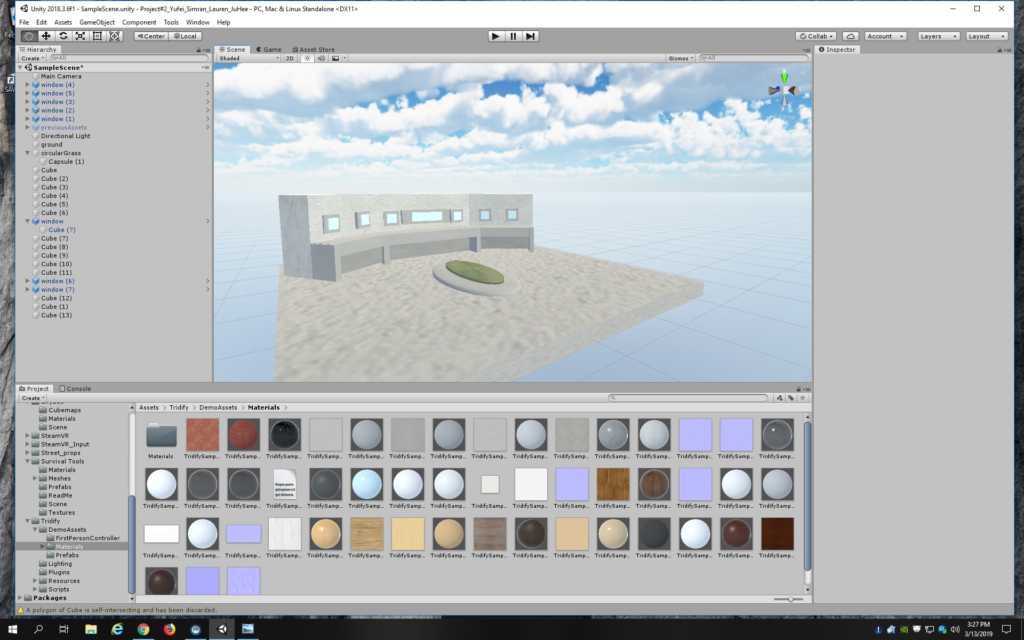
Moving on, I built the space around The Arts Center more. It took a lot of trials and errors to get the right look and see what details will add to it. I realized having the right overall shape of the buildings and the color correct really makes them look realistic. Adding windows is also another fine element that made the buildings come more alive.
Screenshots from work:
building more grass patches around the area
I also looked to see what other structures I could add to make the space more recognizable and realized that there were long, rectangular direction platforms around the grass patches. I went ahead and recreated this in the space:
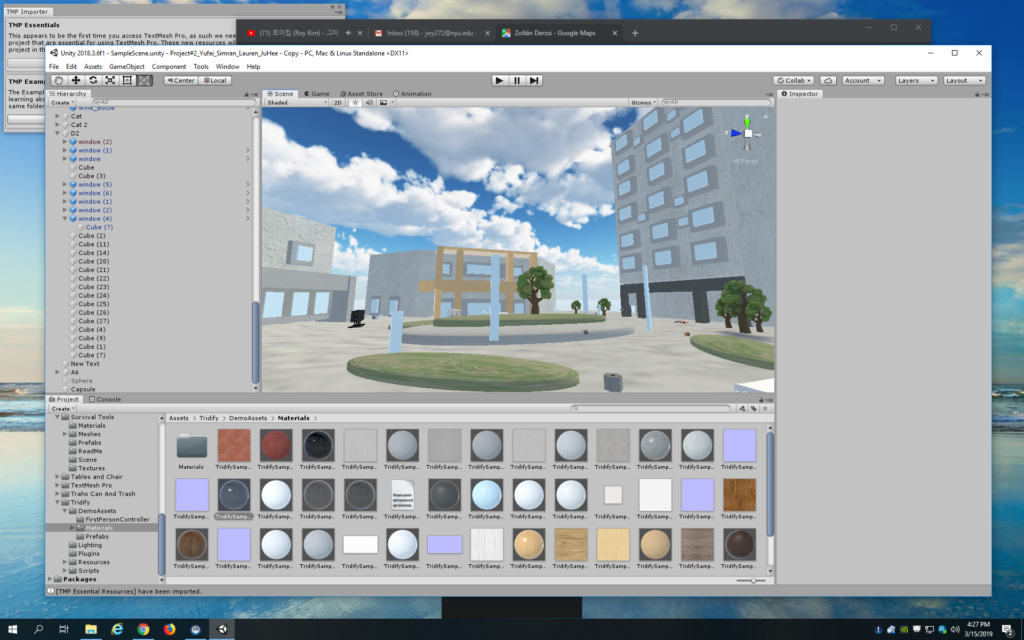
After that I started building the Dining Hall as well as A6 on the other side.
I identified A6 as being the tallest building among the three, and made sure that was clearly visible in the space.
the initial stage of A6A6 rising up from the ground!
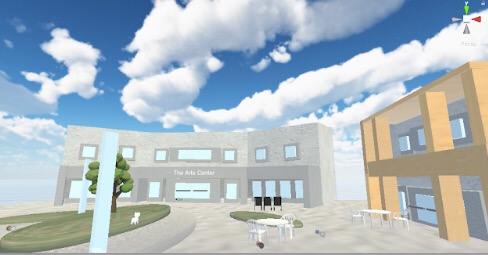
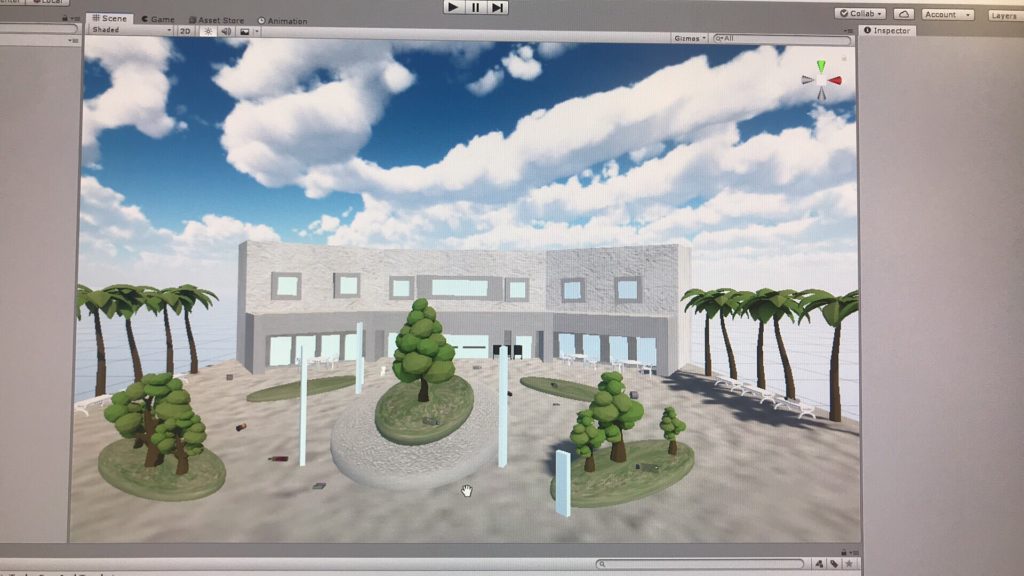
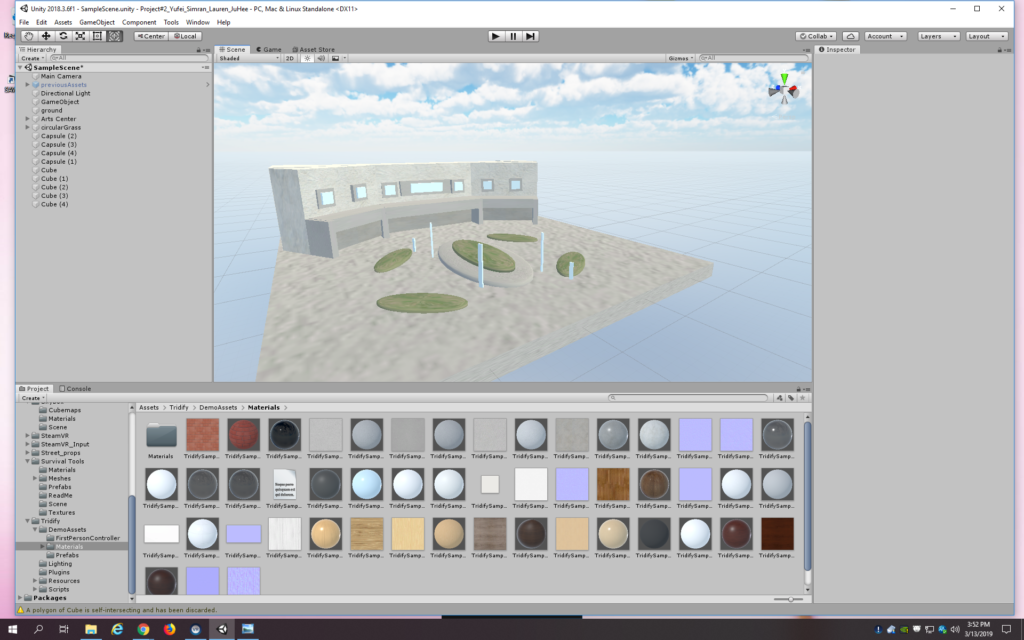
And finally, here we have the final look of the actual environment!
For our group, we decided to make a project on bringing awareness to the environment and waste issue at NYU Abu Dhabi. It seems that many of our students lack the knowledge of recycling properly and frequently, so we want to use this project to address that problem.
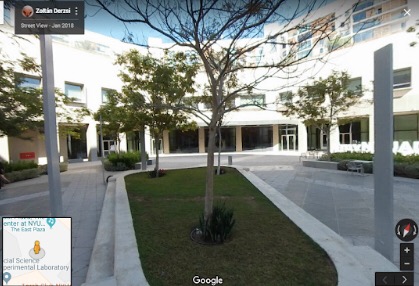
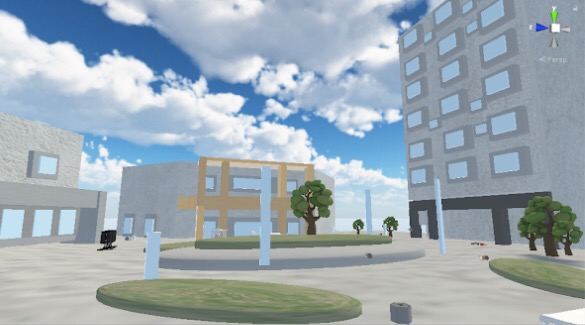
The interaction we want to recreate in this VR project is the act of picking up trash on the ground and recycling it into the right bin. We decided to use our own campus as the actual environment in the project. One important decision we made in terms of the campus was to focus on one portion of it – not too much space, but enough to move around, be able to see trash littered around, but at the same time exude a sense of a closed space so players don’t wander around and stay within that designated area. Our set area was the space right outside D2, where there are grass patches and A6 and The Arts Center are on the side.
So far, the groups have been set to take on the following duties:
Building the environment – Lauren (making buildings and environment) & Ju Hee (adding objects, trash and cats to the space)
Making the interaction – Yufei & Simran (picking up of the trash, recycling into the bin)
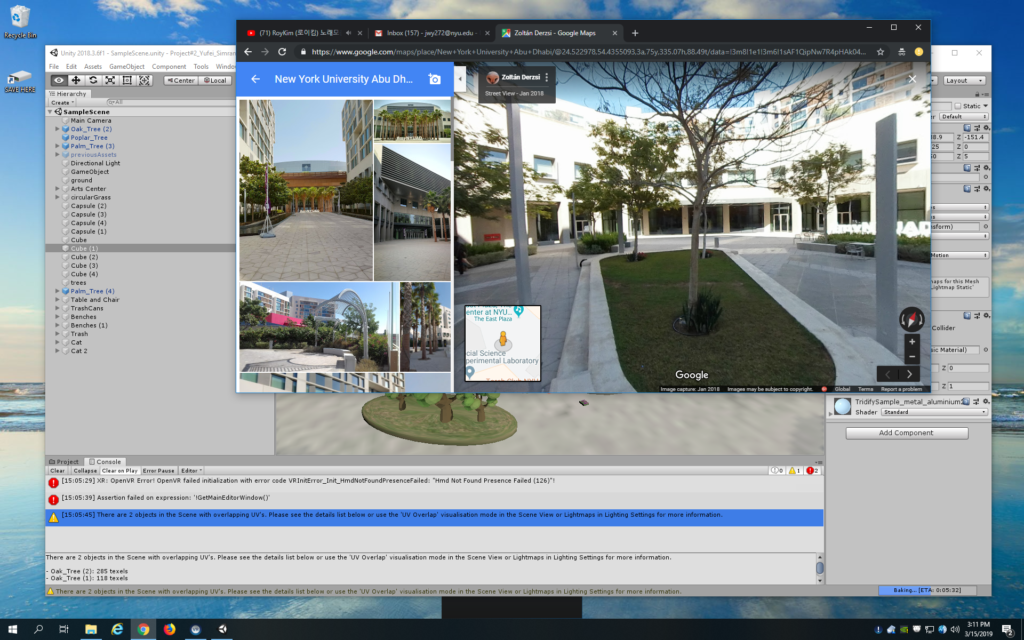
For the environment, I decided to make the actual campus space (buildings, composition, staging and lighting). Initially, I was going to decide on a color palette and build a space using that based on the campus. We thought maybe we could build an “angular” version of our campus using simple shapes. But after trying that out with simple cubes, I decided the key is for players to be able to identify it as our campus and it had to look more realistic. So I went to take some reference photos of that area as well as looking at Google Map to get an accurate sense of space.
referencing Google Map for accurate details
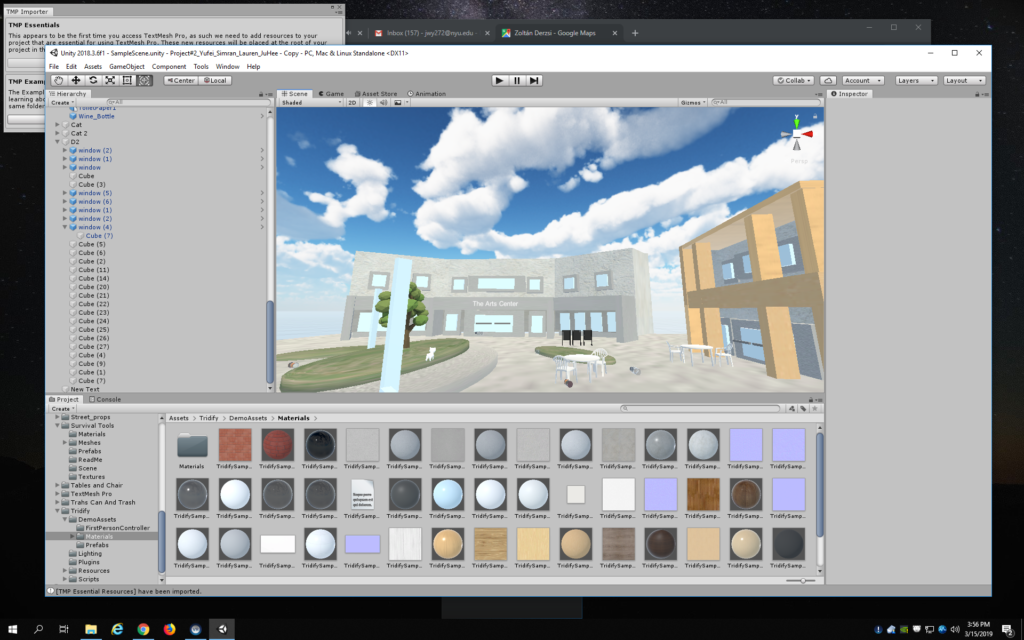
I started working on The Arts Center first because it’s big and easy to recognize. Once I have it finished, I can build the space around it. I also first searched for a lot of textures that I could use for the buildings as well as the ground/environment.
The Arts Center in the making!The Arts Center with more detailsa close up of The Arts Center
I’m happy with the progress I made for today. More coming!
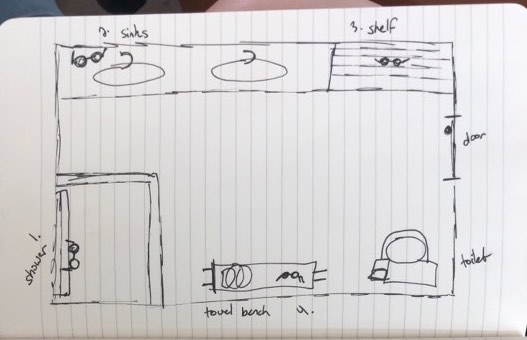
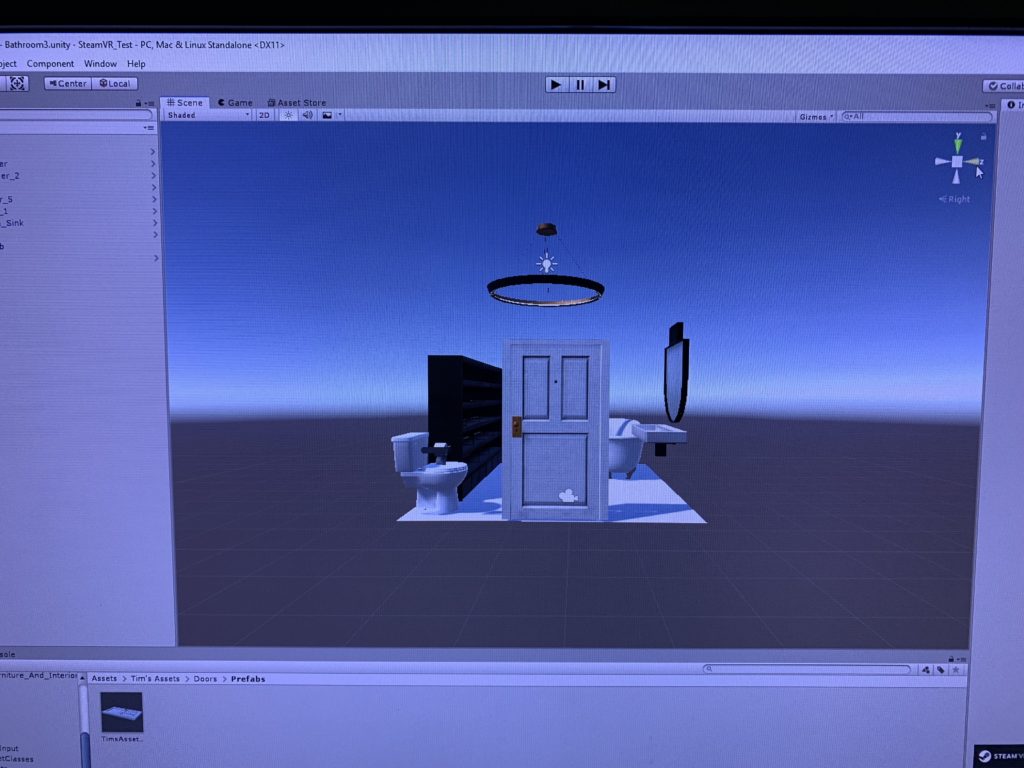
For this project, Junior, Claire, and I decided to play around the everyday theme of having to find your glasses. Coincidentally, all three of us have bad eyesight and so we either wear glasses or contact lenses. We shared our experience of how we struggle to find our glasses, especially in the mornings, as we tend to forget where we placed our glasses the night before.
Rough Draft of the Setting
We decided to choose the bathroom as our location and include a bathtub, a toilet, sink, bathroom shelf, a towel hanger and towels. We had originally planned to place different objects, but after placing some objects, figuring out each of the positions, and removing some objects according to the overall balance, we decided to settle down with the current bathroom setting. We also added the hanging light as our light source.
Getting the correct Position, Rotation, and Scale
Claire and I were in charge of creating the bathroom setting, matching the virtual space to the actual available space in the classroom, placing the four glasses in different places, and making sure that the user felt that he/she was in a bathroom trying to find his/her glasses.
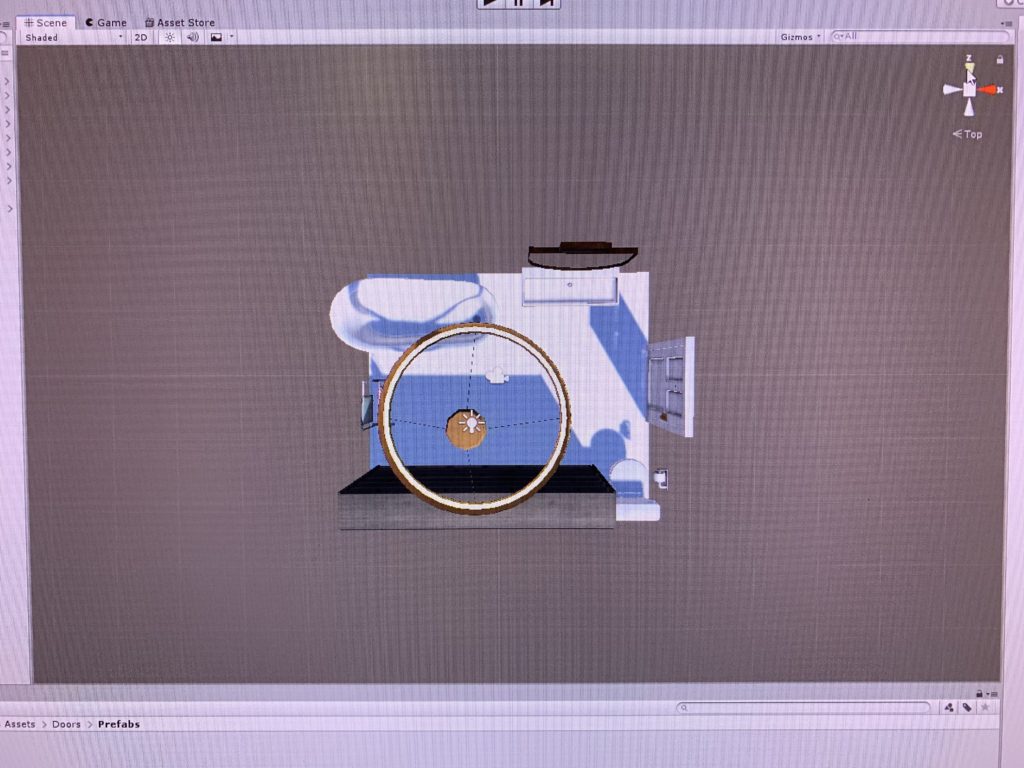
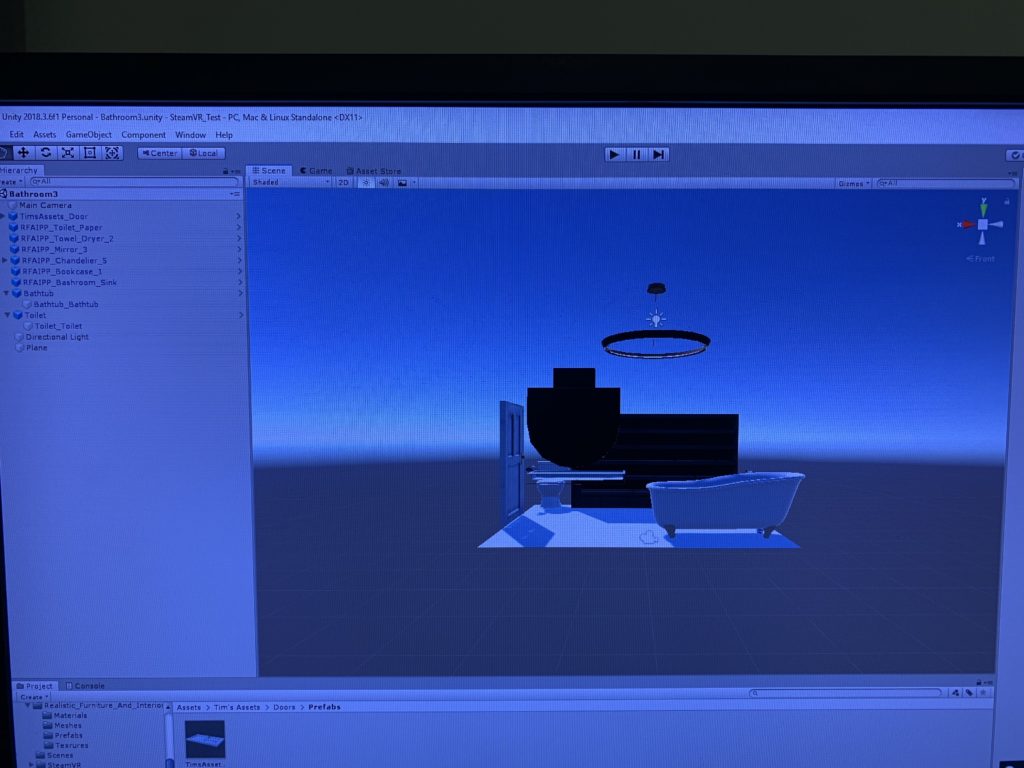
Top View of Bathroom SettingSide View of Bathroom SettingDifferent Side View of Bathroom Setting
For our next steps, we need to add the different functions of the four glasses in order to make it interactive. Each of the four glasses will have different functions – whether they are zooming in, zooming out, different colored tints, and the corrected vision. Although we understand that the blurry vision will cause nausea for the user and may not be suitable for long use, we will play around the degree of blurriness to see how we can make it work.
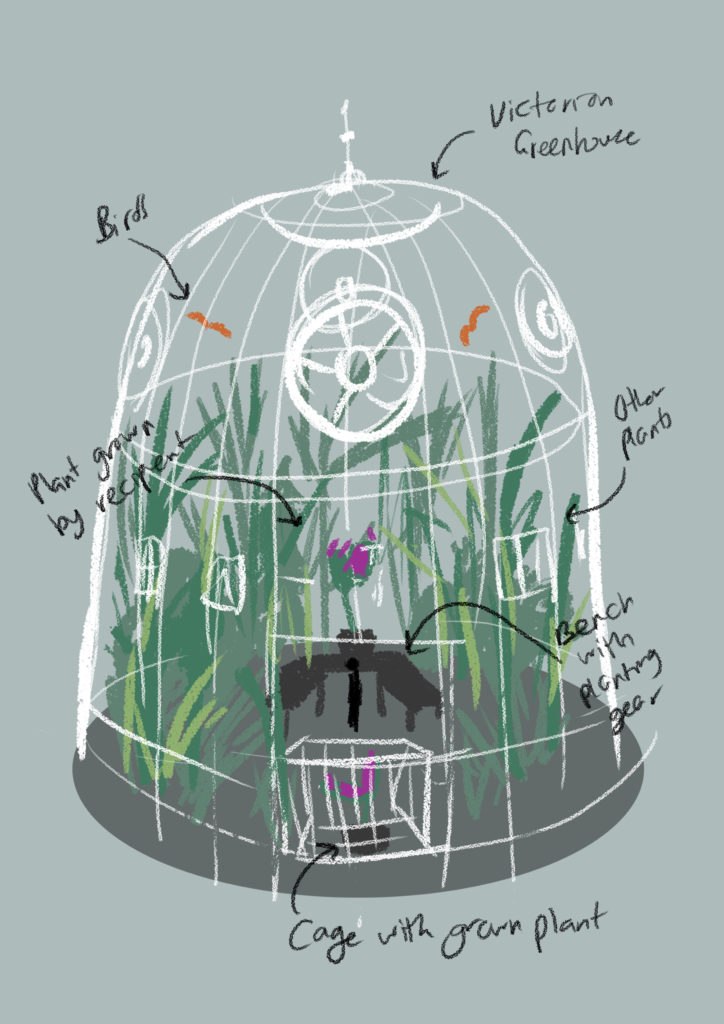
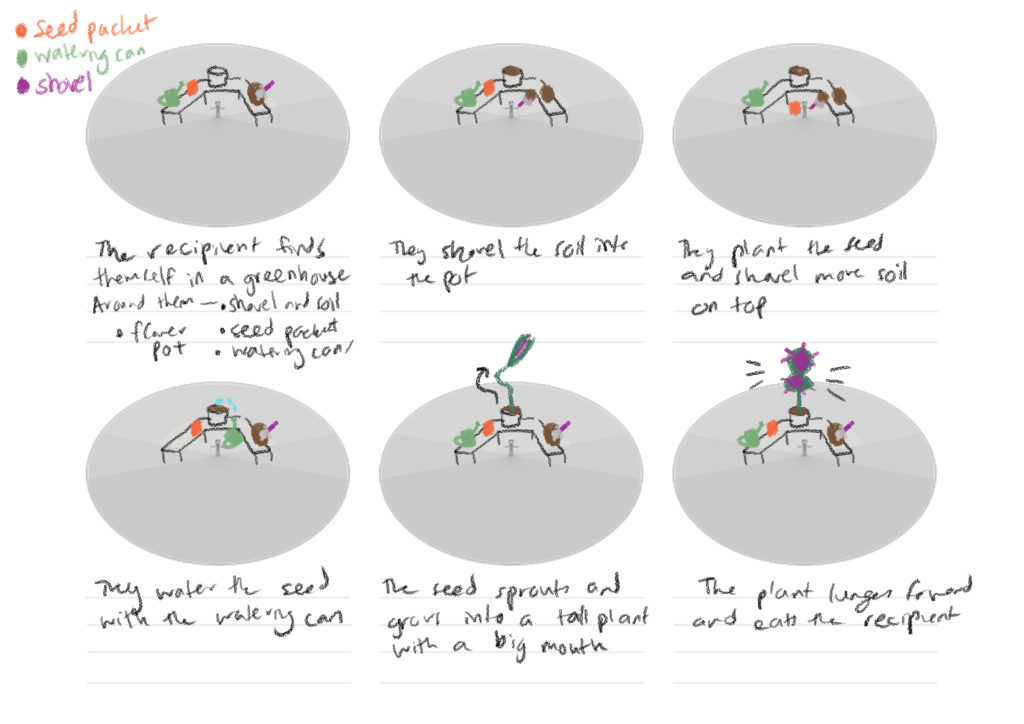
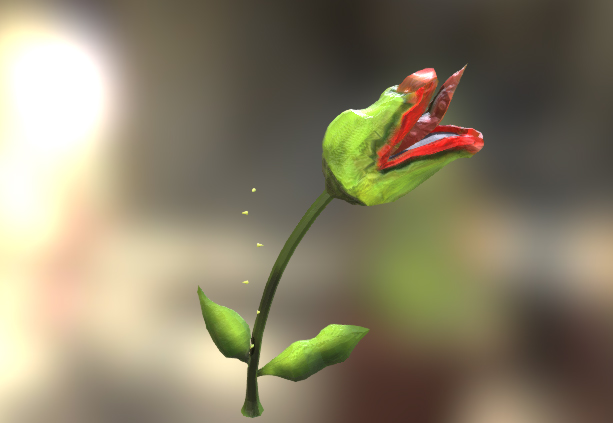
This project is going to be like something out of the Harry Potter universe. It places the recipient in a large, Victorian style greenhouse, in front of a planting station.They are provided with seeds, a watering can and a planting pot. If the user follows what is pretty much expected and plants the seed and waters it they end up growing a giant man eating plant that gets them eaten. Just behind them will be placed a second plant of the same species with a danger sign, an easter egg warning that the user may or may not see.
I envisioned the greenhouse to look like the ones found at the Kew Gardens in London that I visited last summer.
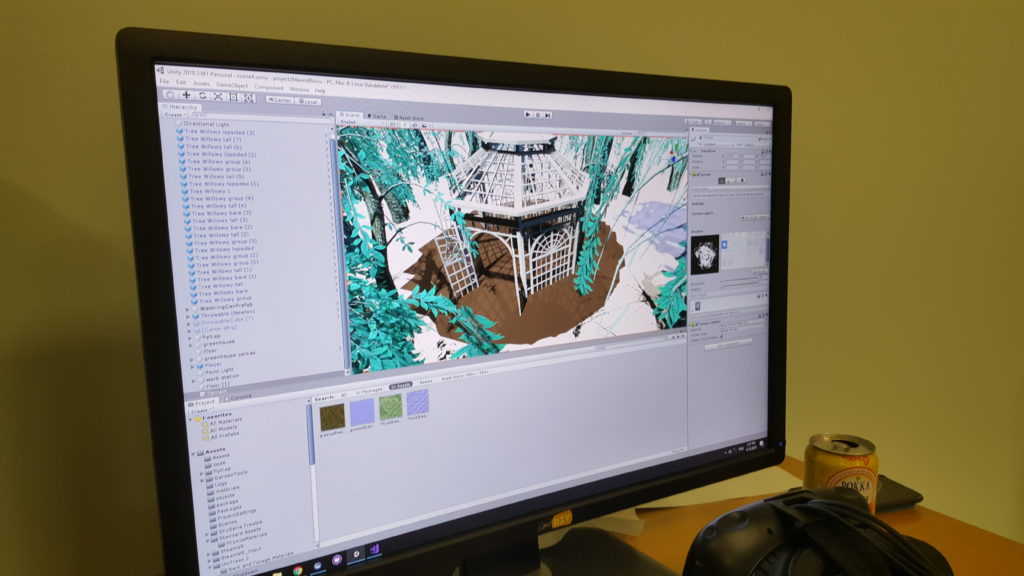
We first set out to find some ready made assets, primarily a greenhouse and the man eating plant. I managed to find a greenhouse that cast some nice shadows and came with a bunch of planting pots and benches. I also managed to find an animated plant with teeth. Getting the animation to loop is something we have yet to figure out. We built the planting area by combining some of the benches that came with the greenhouse.
Then, we began work on the interactions. We brought the player in from one of the example scenes in the Unity VR package. We also brought in a sphere that we will be using as the seed. Adding colliders to the pot and the table allowed us to place the objects on the surface and drop the seed into the pot. Figuring out how to detect the tilt of the watering can to start playing the particle animation of the water took some time but Max was able to figure it out.
I built an expansive terrain around the greenhouse to create a expansive forest. I sprayed the area near the greenhouse with patches of grass and a single species of tree but nothing too extreme or different so That the focus would remain more on the inside. The greenhouse was populated with strange alien plants, trees that reach above the recipient’s head and some close by the use in planters, some of which came with their own animations. The bench forms a visual barrier around the user. These worked wonders for bringing the space to life. Some of them emit clouds of spores, which became quite distracting so I ended up removing them.
To add another ‘alternate’ element to the world we added a creature, a giant butterfly in the sky. The butterfly makes the outside seem an even more daunting space than the inside.
We added some gardening equipment into the space the the recipient can pick up and play around with as well. I think it may make a fun ending to the game if the user was to pick up one of these and fight off the monster plant.
The growing of the flytrap is triggered to happen when both the soil and the water have contact with the seed for a certain amount of time. This took several hours to figure out how to do. The plant, which is already in the pot but extremely small in size grows larger and animates, lunging at the viewer.
Finally, we decided to add some ambient and 3D sound. We found a bunch of sounds on freesound.com. The sound of a tropical rain forest plays around the recipient as the plant in the cage behind them emanates, low, rumbling growls.