Project 3 Documentation

Windows XPerience

By Junior Garcia and Juhee Noh

Development Blog: https://alternaterealities.nyuadim.com/2019/05/19/project-3-development-blog-2/

  1. Project Description: describe the space, the “storyness” it conveys, and the inter-relation between modes of interaction and the logic of the world.

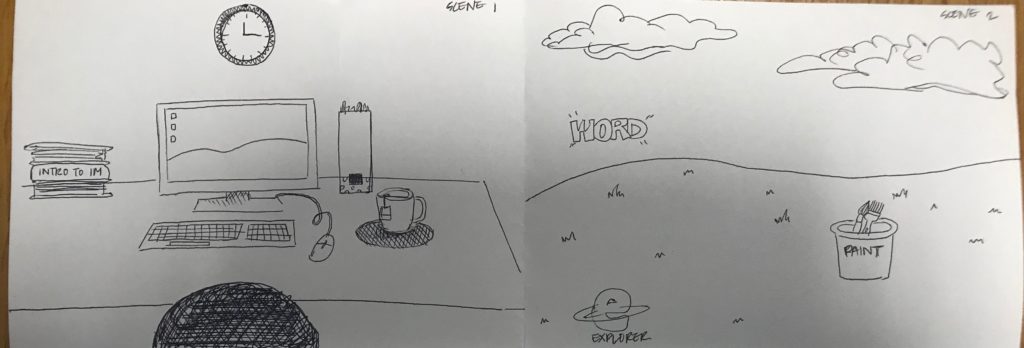
As a kid, I was always fascinated by computers. How could they achieve tasks that are so inherently complex in a matter of seconds and with seamlessly little effort? Now that I am studying Computer Science, I know that every single computer-based task takes hours of algorithm design and coding implementation that breaks down the difficulty for the end-users. As such, I wanted to convey the difficulty of a computer-based task as simple as submitting an assignment through Gmail by taking full advantages of the features lent by Virtual Reality through the Unity Game Engine. In addition, I wanted to explore the idea of space, and how space is defined in a medium as nascent as Virtual Reality where the artists have a full range of control of the experience they want their audience to feel, see, listen, and fully engage in. As such, me and my partner Juhee decided to bring back a vintage piece of technology in Virtual Reality: the Windows XP computer. We want the users to feel enthralled by the space inside of a Windows XP computer, to enjoy the iconic green mountains laying against the beautiful blue sky. This scenery will be juxtaposed by the clock-ticking task of submitting an assignment via email. The user has to enter the computer, physically juggle through a bunch of documents that come from the folder icon to look for the assignment, enter google chrome, and submit the assignment. However, the former task is not as easy as expected as the internet connection is lost and our player must face the jumping dinosaur from Google Chrome. To submit the assignment, the user must kill the dinosaur with giant cactus. This allows for the mailbox to appear, where the user can submit the assignment and win the game.

Our project is a combination of a linear-storyline game with the abstractive storytelling of an iconic space. We hope that combining both elements will provide users with an experience that is both sensory satisfying and competitively fulfilling.

Originally, the theme we chose for this project is “close the door”. However, after implementing the project, we believe the scope of our theme expanded. The theme is touched upon when the internet connection is lost and the user is stuck in the Chrome environment with the dinosaur, with no escape other than to garner the courage to fight the dinosaur or succumb to their inevitable death. However, given the exploratory nature of our ideation process, the user can interpret the storyline the way they best see fit. Is the door really being closed after entering inside a computer or are we opening the door to a world where humans can live in a digital environment? Is the dinosaur a friend or a foe, acting out of spite towards an intruder or merely following the strings of ones and zeros that tell it to jump on top of every obstacle that lies in front of it?  These are the questions we hope our users take with them, and we expect that our projects leave users with more questions than answers.

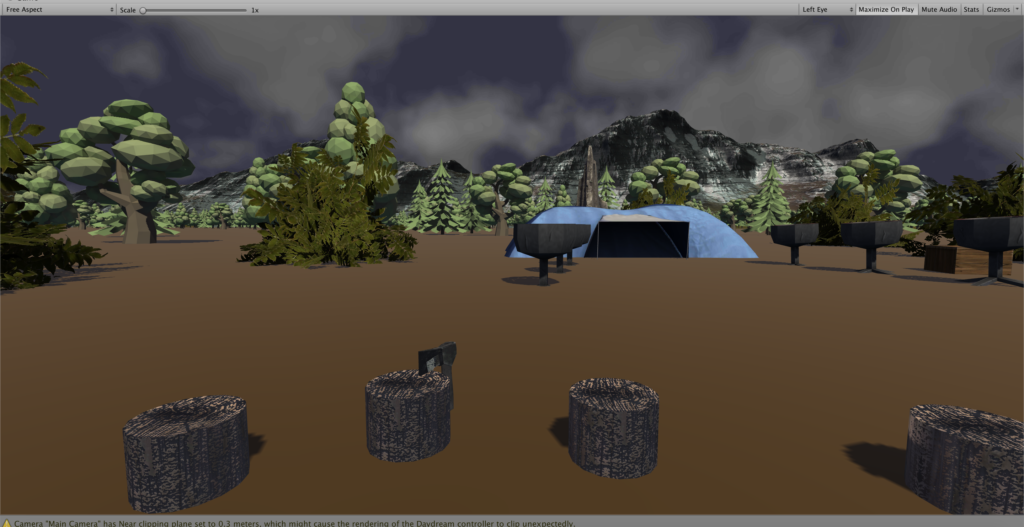
2. Process and Implementation: discuss how you built the space and design choices you or your group made. What did the brainstorming process involve? How did you go about defining the logic of this world? What were the steps to implementing the user’s role? Share images or sketches of visual inspiration or reference, including the storyboard/layout.

Idea Development:

Initially, our team was just excited to play with the idea of entering inside the Windows XP Environment. However, given the limitless provided by this idea, we relied heavily on several playtest sessions and feedback from different individuals in order to narrow the scope of our project to the point where it was playable, achievable, and entertaining enough.

Prototype for feedback generation:

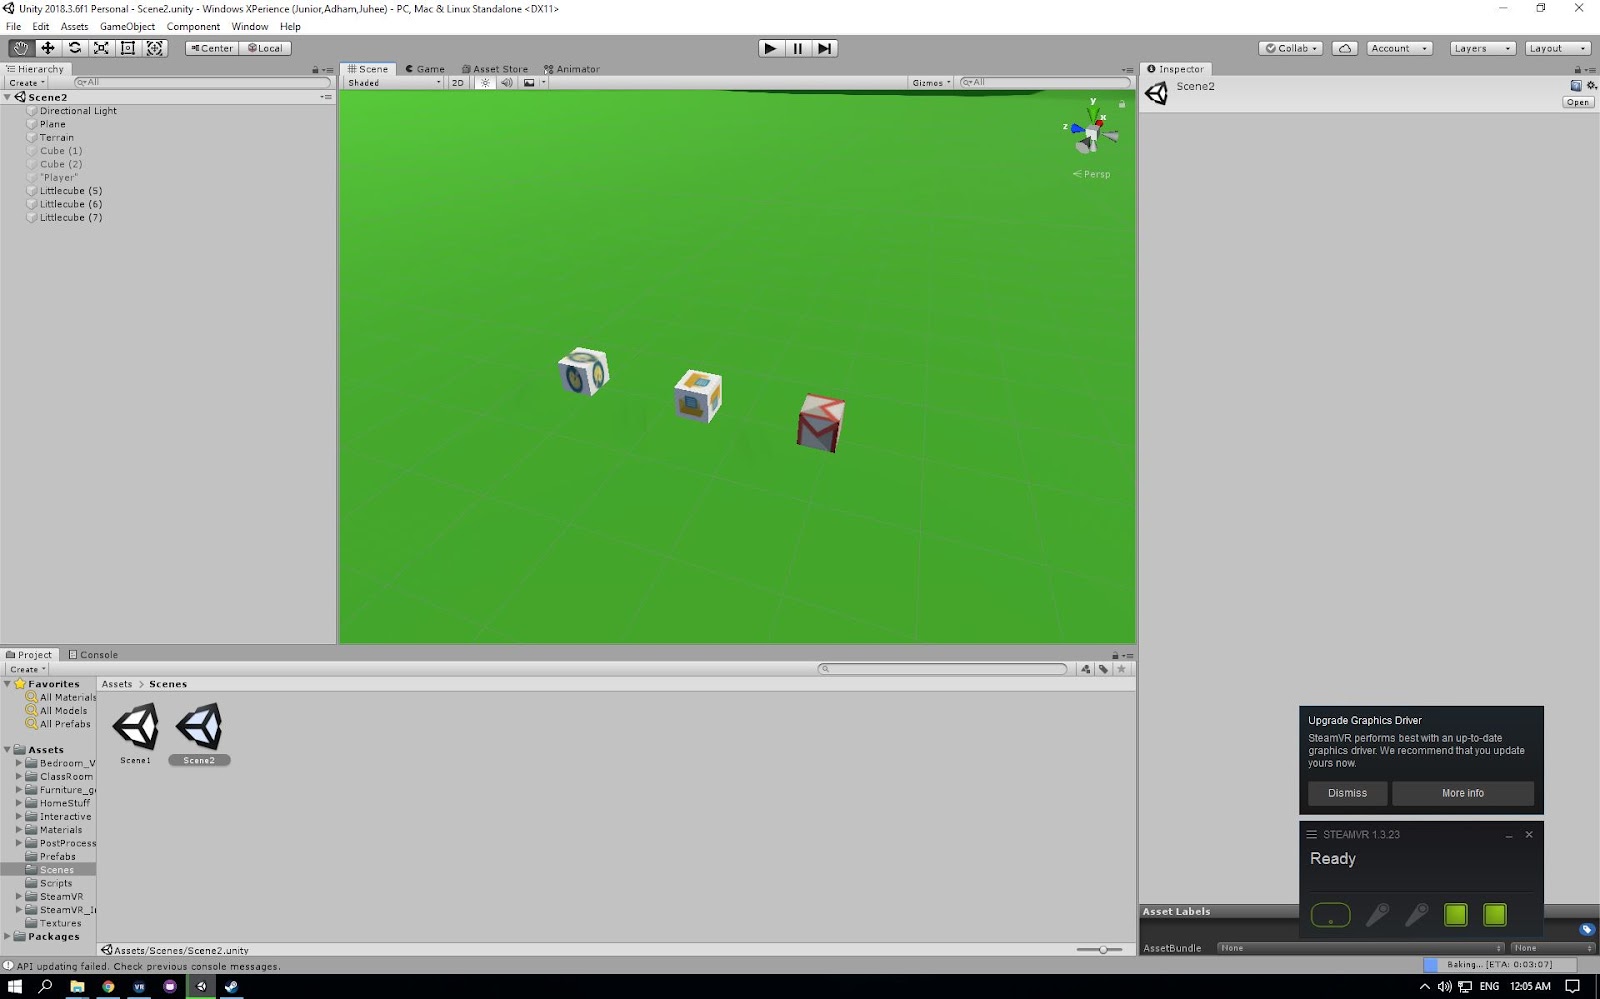
Our initial prototype we relied for user-feedback and playtesting was composed of two scenes. One scene was just a monitor and that was interactable and the second scene was just a green terrain with three computer icons.

We partook in a total of 4 playtest sessions and one idea-critique session with our Professor Sarah Fay Krom.  After the playtest sessions, we decided to use the task of submitting the assignment in order to give the users some form of direction in this highly exploitable world. The storyline after the playtest sessions was the following:

Initial storyline diagram

However, after talking with Sarah, we fixed several logical mishaps that were affecting our storyline.  The first one was that the Google chrome Dinosaur signified lack of connection and it didn’t make senses that the user would get stuck in the internet after loosing against the dinosaur. The second one was that initially we wanted to kill the dinosaur with the assignment itself. Sarah recommended that we instead kill the dinosaur with the cactus as this is what happens in the real-life version of the game. We incorporated this two pieces of feedback into our ultimate version of our storyline:

Storyline

  1. User is in a room, the user clicks on computer
  2. The user is inside the Windows XP computer
  3. The user must get the assignment from the folder file
  4. The user must go to google chrome to submit the assignment
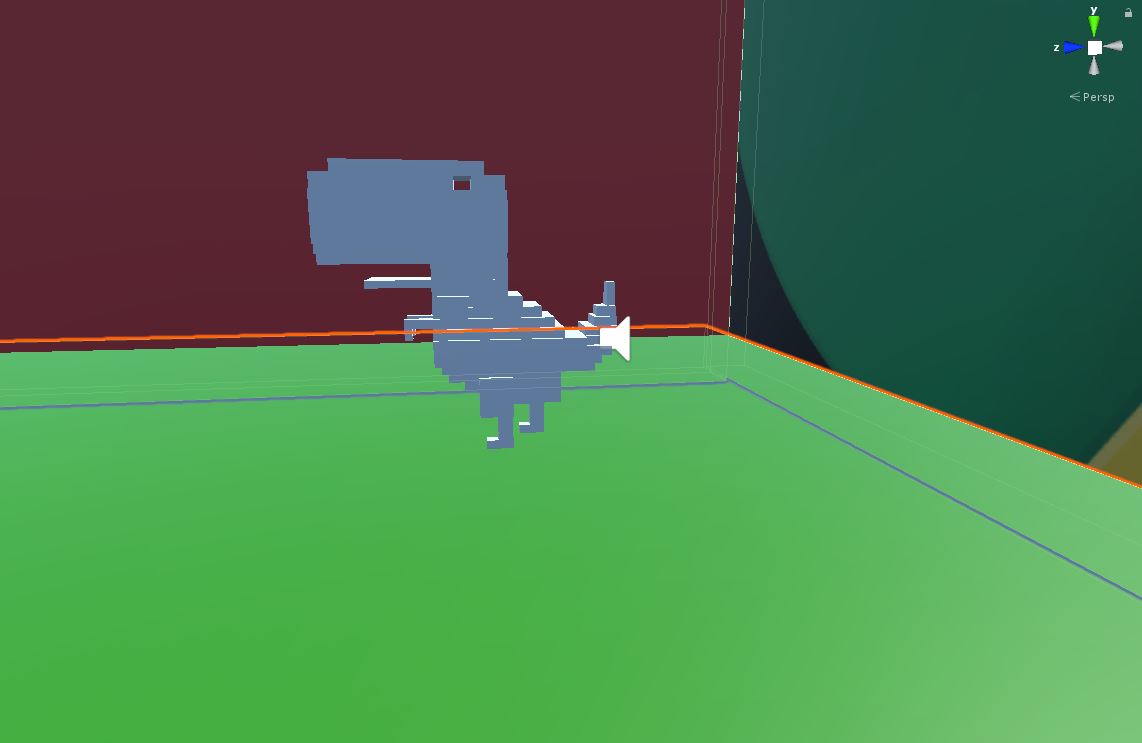
  5. The user is inside google chrome. The dinosaur approaches the user and attempts to jump on him/her. The user must grab the cactus to hit the dinosaur three times and kill it.
    1. If the user gets attacked by the dinosaur three times, then he is sent back to the initial room scene. Go back to step 1
    2. If the user attacks the dinosaur three times with the dinosaur, then the dinosaur disappears. Go to step 6
  6. Gmail icon appears and the user must put the assignment in the icon. Game ends

Technical Implementation

Scene Design:

Scene 1: Room with Windows XP compouter
Scene 3: Combat Studio
Scene 2: GreenMountains, icons, and blue sky
All three scenes merged into one

All three scenes were placed in the world and the transform.position of the player was changed in order to bypass the issues provided by the Scene Manager in Unity. The initial scene was the monitor was located in was designed with the early 2000s look in order to match the old-look of the monitor. The 2nd scene was designed to emulate the Windows XP background, with mountains created by modifying the height of the terrain and the skybox changed with one found in the asset store that we believed best resembled the cloudiness and blueness of the Windows XP background. The third scene was a combination of a combat studio and the style of Google Chrome’s design. .We wanted to give the world an appearance similar to that of a combat studio because the user would be confronted, 1v1, with the dinosaur. As such, we went with a confined box environment, which creates the solitary, depredatory aura that we want the user to feel. We also decorated the box with Google Chrome’s iconic green, yellow, red and blue colours on the sides of the cube, with one side being the google chrome icon itself in order to let the user know where they are at all times. The entirety of the project was accompanied by the Windows XP startup music in order to fully encapsulate the user with the illusion of being trapped in a Windows XP computer.

Scripts

  1. Destroy Monitor: This script is attached to monitor in initial scene to ensure it is destroyed after the player is moved to the next scene.
  2. Mailbox Script: Script attached to the mailbox that ensures the game is restarted after the user wins the game by submitting the assignment to the mailbox
  3. Follow Target: Controls the behaviour of the dinosaur and ensures  that the dinosaur follows the user by using the Vector3.Movetowards function. A force is added to the rigid body to simulate the jumping. And counters (namely “lives” and “hits”) are used to know the times the dinosaur is being hit.

Important code design in this script;

  • Vector3.Movetoward: This function simplified my code immensely. It boils down a lot of the code that I did before to make the dinosaur follow the target as it literally makes the object follow the object with an incremental change in position after every frame and it also changes the rotation of the object so that it looks at the target.
  • Rigidbody.addforce: Before, I was trying to literally hardcode the position the dinosaur had to be when it jumped, which seemed unnatural as the dinosaur would disappear and then appear somewhere in the air and then fall down. By setting the ForceMode to Impulse and determining the position in space you want the dinosaur to be after the jump, this line of code creates a natural jump of the object to the desired height.
  • Quaternion. Euler: Something that was happening after the force was added to the rigidbody was that the dinosaur would move amongst its own axis in space. In order to stop this, I froze the rotation of the Game object using the quaternion.euler function in the Update function so that it remains in place within its own axis after every jump.
  • Lives and hit counter: The lives and hit counters are an essential variable in the dinosaur that determines a lot of functionalities in my project. Whenever the number of hits is equal to the number of lives assigned to the dinosaur in the inspector, the mailbox appears. The mailbox then detects a collision between itself and the assignment to determine the win condition. This can be further appreciated in the mailbox script I attached to the mailbox.
  • Coroutine and Delay function: I also learned about coroutines and implemented them in the script as well. I used them to cause a delay between every jump as the jumps were happening very frequently frame after frame. I also added the coroutine on the collision detection so that the number of hits between the dinosaur and the player was reduced as a lot of collisions were happening frame after frame too.
  1. Foldercoll: Script that instantiates papers and the assignment when the folder icon touches the ground.
  2. Sceneswap 2_1,scenesawp 2, and sceneswap: Changes the transform.position of the user whenever the user throws the monitor (scene 1 to scene 2) , the user puts the assignments in chrome(from scene 2 to scene 3). In scene swap 2 and 2_1, 2 detects a collision between assignment and chrome icon and sets the assignment collide  boolean to true, which is then referenced be Sceneswap 2_1 to change the transform of the user to the next scene.
  3. Dino attack; Script that keeps track of the number of times the dinosaur attacks the player. If the lives are exhausted, the user loose and the game is restarted.
  1. Reflection/Evaluation: This should discuss your expectations and goals in the context of the what you felt was achieved with the finished piece.

All in all, the project succeeded in raising questions on the possibilities allowed by VR by allowing us, the designers of this world, to exploit the untethered territory of vintage technology by bringing it to life. We believe that this project was able to achieve its goal from an ideological perspective as it proved to spark questions and positive comments on every user we player tested it with. Indeed, most users started questioning the reason why they had to fight with the dinosaur. Others saw the dinosaur as an immediate threat as evidenced by their screams after they first had the majestic creature in sight. Others would just spend a couple of seconds enjoying the scenery of the Windows XP background. This was really fulfilling as we wanted each user to have a different experience when playing our game under the same assigned task of submitting the assignment and fighting the dinosaur. However, there are some technical bugs that need to be fixed:

  • In chrome world, the assignment goes far away

In the hastiness of fighting the dinosaur with the cactus, some players would throw the assignment far away and wouldn’t be able to catch it after beating the dinosaur so they could win the game. Maybe adding teleportation would have solved this problem, in order to give the user more freedom of movement. Also, teleportation would have made the final fight scene against the dinosaur more exciting as the user could escape the dinosaur and fight it at the same time. This problem could have also been solved by adding box colliders to prevent the assignment from going beyond reach.

  • The initial scene is too big

Scaling our scene was a big issue. When we made the scenes, they were done at a very small size, which also affected the gravity of our objects. Resizing all of the game objects to an appropriate Unity-unit size would have made the experience more enjoyable.

  • Make a more robust, complete UI system

Definitely, the UI we implemented in our project wasn’t as complete as it could have been as we still needed to vocally guide users through our game despite the fact that we added the UI canvas with the instructions. Maybe incorporating audio feedback in every scene would have helped the users know what to do at every step in a more succinct manner.

In retrospect, this project was a nice way of culminating a semester long endeavor of exploring the possibilities brought forth by Virtual Reality and it empowered me to be an artist,designer, technological philosopher, and software engineer all at once.

Project 3 Development Blog


Final Documentation: https://alternaterealities.nyuadim.com/2019/05/19/project-3-documentation-3/

April 8,

Project Title: Windows XPerience

Team member: Junior, Ju Hee, Adham

For this project, we will go back in time to revisit a staple piece of technology: a Windows XP computer with the classic green valley and blue sky background. Our inspiration came after a rigorous brainstorming session were we touched base on a lot of ideas that interested us. After presenting some of the ideas to the class and after further deliberation amongst our group, we decided that this idea provided the best balance between abstract storytelling and realistic implementation considering the timeframe and themes available. The theme our piece will be based on is: “close the door” and we hope to do so in an interesting way, giving the user the possibility to decide the ending of a story where, inevitably, the door will be closed.

As seen in Scene 1, the user will be in a room with his old-style windows computer appearing in front of him/her. As he/her clicks on it, he will be sucked inside the computer, shadowing the idea presented by Richard Moore in the Disney Animated film Wreck it Ralph 2. In order to escape the computer, the user will have to click on a set of icons in a predefined sequence. Each icon will transport the user into a different scene, and it is up to the user to click on the right set of icons to escape.

Possible Assets:

  • Windows XP Icons
  • Furniture for the room
  • Laptop
  • Paint brushes (Paint Program)

Interactions to Design and Code:

  • Clicking on the icons
  • Scene Manager to move from one scene to another

Sound:

  • God-like voice that tells the user the situation he is trapped in and gives him clues to possibly escape the computer
  • Sound effects for clicking on different icons
  • Sound effect of getting absorbed into the monitor
  • Peaceful background music when the user is in the green valley

Lighting:

  • Stark contrast in lighting between the room and the inside of the computer.

April 12

In preparation to this project, I decided to start looking into different logistical things that need to be figured out later on but will be beneficial to do so early in order to maximize workflow efficiency amongst all of the team members. First off, I thought it would be a good idea to think of ways we could use GitHub in order to work simultaneously on different portions of the project. As such, I created a GitHub repository to ease collaboration:

https://github.com/jgarcia1599/Windows-XPerience

Link I used to setup the github repository:

Something else I decided to start looking into was the different options we could look into when designing the User Interface of our project. The UI can be manifested in different ways, but one of the clearer options is to add a beginning and end screen to add a conclusive narrative to our piece.

Useful links:

April 14

In preparation for the rough prototype deadline tomorrow, we decided to build a rough version of our two initial scenes in order to show the class the direction our project might go into.

We started with a blank scene, and we added a monitor we got from the asset store. One of the problems the monitor was giving us was that its screen had a predefined animation sequence. We had to remove that and change the canvas of the screen to the Windows XP background.

We also created the second scene, which was composed of a terrain object we modified by changing its colour to green and by playing with the edit height/edit texture tools to create mountains (really bad ones as it is a prototype).

We also added the interactable script (and all of its dependent scripts) from the SteamVR library to the monitor and the icons. We also added a sceneswap script to the monitor. This script checks a change in the transform.position.z (any coordinate variable could be used to make this logic work) of the monitor and unloads the current scene and loads the new scene whenever this change occurs.

April 15

Playtest Session #1

In class, we were able to get meaningful feedback from the class from our Playtest session. One of the problems our project has is that it can go into many different directions. Since there is a lot of staple icons we could recreate in our project, each of them would require an ample amount of work to the point where each one could be a project in it of its own. For example, recreating a Paint icon that would allow users to create any form of Paint-generated artwork could be a project that exploits the artistic capabilities of Paint in a 3D virtual-reality environment. As such, we heavily rely on Ideation and Feedback sessions like this one in order to narrow the focus of our project.


This is some of the feedback we received in class after playtesting our prototype:

  • Keep interactions and everything in one scene
  • Virus takes over the computer. You need to defeat the virus
  • Maybe after you defeat the virus you become king

Generally, people would like to fight against some of the iconic enemies you can find in a computer (a.k.a a virus). Maybe giving the user a predefined task like this one could narrow the focus of our project as it is really open-ended as of right now.

April 17

Having Sarah Rotberg in class was definitely useful as it brought to our attention something that we did not previously consider. She recommends her students in her VR class that their projects should keep the users entertained for a minimum of three minutes.  Even though we didn’t have time in class to present our project idea to her, this feedback is useful as we are looking at ways of narrowing the focus of our project. Maybe giving the user a task to do could be too short of an experience. The idea that we have right now is to make the user submit an assignment. However, in terms of the VR context of our project, how could we recreate a physical manifestation of such an Internet-based task that is engaging enough to keep the user entertained for a minimum of three minutes?

April 21st

Playtest Session #2

In order to have a better, more complete idea of the way we would like to direct the user towards a sequence of actions he/she must complete in our project, we decided to playtest our prototype with our friends without giving them any clue of what our project is about. Attached is a video of our playtest session:

Lauren
Steven

After letting our friends play our prototype, this is some of the feedback we received from them:

  • Things they liked:
    • They liked playing with the boxes
    • They had the sense that they were getting inside the monitor
  • Things they didn’t fully understand:
    • The transition from the monitor scene to the inside of the monitor scene wasn’t clear. Maybe have a loading screen or a shaking of the camera that creates a pause and indicates a transition from the room to the inside of the computer.
  • Things we could do to make the experience better:
    • Interact with something iconic on the internet (error 404 guy, google chrome dinosaur)

Based on our playtester’s feedback and our previous idea of submitting an assignment, we would like to combine both ideas into one. The iconic character our users would be interacting with is the jumping dinosaur in google chrome. We chose this character in hopes that it is iconic enough for any common user to familiarize with and to incorporate the internet on a controlled environment that is both technically feasible and significant enough to send our message across. This message, we hope, is to allow users to physically engage in a computer-based task in a way that takes full advantage of Virtual Reality.

Task Division:

Junior (Interactions):

Scene swap (done)

Throwing objects (done)

Make a bunch of papers appear from the folder after its thrown

Grab one of the papers and put it close to the google chrome icon

Make a dinosaur appear that jumps

Dinosaur wants to get close to you and jump on you

Attack the dinosaur with the folder

Juhee (Scene Design):

  • Room scene
  • Green valley (inside the computer) scene
  • Stuck in the internet scene
  • Google chrome scene

Adham (User Interface and sounds):

  • Beginner and ending screen(2) (one for each ending)
  • Instruction to users on what to do on each step of our story (either by a UI canvas or through sound)
    • When inside the room, the user must touch the computer
    • When in the green valley, the user must throw the folder to make a bunch of papers appear, grab the final version of the paper, and put it in google chrome
    • When inside google chrome, the user must attack the dinosaur with the assignment three times and he shouldn’t let the dinosaur jump on him
  • If the user wins, then he should go back to the original scene and he should be notified(somehow) that he has successfully submitted the assignment
  • If the user loses, then he should be indicated that he has been stuck on the internet.
  • Sound effects that indicate transition from one scene to the next.

April 24

Today I had a really useful Idea-critique session with Sarah. She mentioned a couple of things that we must bear in mind as we try to finalize our project’s concept:

  1. Google Chrome dinosaur signifies lack of connectivity: This is an important piece of information that we must keep in mind. Our original premise was that after the dinosaur killed the user, the user would be stuck on the Internet and lose the game.  How can the user be stuck on the Internet if the dinosaur only appears when there is no internet connection in the monitor? As such, we fixed this logical mishap by making the user restart the game. This not only fixes our storyline’s logic but also extends the playtime to the user as it makes him/her play the game a couple of times until they are able to beat the dinosaur and submit the assignment.
  2. Kill the dinosaur with a cactus: Before, we wanted the user to kill the dinosaur with the assignment. However, Sarah recommended that we could give the user a cactus to kill the dinosaur as that is what actually kills the dinosaur in the real-life version of the game.

April 27-28

One of the main things that we must accomplish is to make the dinosaur jump and follow the user. As such, I created a script that follows the user (namely the target) and starts jumping after if it reaches a certain distance from the user. In every frame, I calculate the vector3 distance and the magnitude between the dinosaur and the player and I make the dinosaur aim at that direction and change its transform every frame with a predefined speed.

Made the jumping dinasour script

using System.Collections;

using System.Collections.Generic;

using UnityEngine;

public class followTarget : MonoBehaviour

{

   public GameObject target;//the target dinosaur will go to are going too

   public float speed;//the speed of enemiess

   public float jumpingdistance;//distance between object and target

   public bool jumped = false;

   public float jumping_height;

   void Start()

   {

   }

   // Update is called once per frame

   void Update()

   {

       Vector3 path = target.transform.position – transform.position;//calculate the path to target

       path = path / path.magnitude;//calculate only the direction of the path

       if (Vector3.Distance(target.transform.position, transform.position) <= jumpingdistance && jumped == false) //&& to_jump == false && jumped == false)

       {

           path.Set(path.x, jumping_height, path.z);//set the path to the jumping height

           transform.forward = path;//make enemies look forward to the target

           transform.position = transform.position + speed * path;

           jumped = true;//use jumped boolean to avoid infinite jumps

       }

       path.Set(path.x, 0.0f, path.z);//set the path on the ground

       transform.forward = path;//make enemies look forward to the target

       transform.position = transform.position + speed * path;//move enemies with speed “speed

   }

   void OnCollisionEnter(Collision collision)

   {

       if(collision.gameObject.name==target.name)

       {

           Vector3 backwards = new Vector3(transform.position.x – jumpingdistance, 0f, transform.position.z – jumpingdistance);

           transform.position = backwards;//make the enemy go backwards if it collied with the player

           jumped = false;// set the boolean backl to false to restart the jumping action

       }

   }

}

I also made the destroyer script that destroys the player after it has been jumped on 3 times. Instead of destroying, the player will be sent back to the initial scene to start all over

using System.Collections;

using System.Collections.Generic;

using UnityEngine;

public class objectDestroy : followTarget

{

   // Start is called before the first frame update

   void Start()

   {

   }

   // Update is called once per frame

   void Update()

   {

       if (jumpcounter==3)

       {

           Debug.Log(“You died”);

           Destroy(target);

       }

   }

}

One of the problems I encountered while making this script was that the user could not be detected during game time. This comes as a result of using the Scene Manager, which has two simultaneous scenes running: the scene the user is currently in and the “DontDestroyonLoadScene” which carries the user (and any other objects the user was carrying from the previous scene) into the new scene. I didn’t fully comprehend the complexity of this problem as I was prototyping the jumping interaction in my computer with boxes.

Given the little time, there is between today and the project submission, one solution that was proposed to me by my classmate Max is to include all of the scenes into one and just change the transform.position of every object into the position of the new scene.

May 3-5

This weekend I worked on Instating Paper objects whenever the folder Icon collides with the ground. We also worked in finishing up the green valley scene and in uniting all 3 scenes into one to bypass the “DontDestroyonLoad” Issue.

What this script does is that it instantiates a new paper Game Object after every collision the folder has with the terrain. The paper was created out of an empty cube object that was then given its paper look by adding a paper material on it. There is also a counter that limits the number of papers that can be created after every collision with the terrain (10 collisions maximum). I also created a Random Number generator function that creates a random number between a range of number (for this project, this range is set between 1 and 10) so that an assignment paper can be instantiated only once and randomly. The assignment paper is the same as the other paper objects with the addition that canvas was added on top of it with the text “Assignment”.

Juhee and I also worked on doing the final touches in our Green Valley scene. We fixed the mountains and changed the skybox to one with more clouds that are vanishing as we thought it gave the scene a more invigorating, powerful feel to it. The mountains were also carefully designed for, not too big or not too small, in order to best recreate the vintage Windows XP look.

Juhee also spend a fair amount of time designing the dinosaur object. She made it out of a lot of cube objects to give it its iconic, pixelated look.  

We also decided to create a Google chrome world, one that sends the message across that the user just landed in Google Chrome but it an abstract way. We also wanted to give the world an appearance similar to that of a combat studio as the user would be confronted, 1v1, with the dinosaur. As such, we went with a confined box environment, which creates the solitary, depredatory aura that we want the user to feel. We also decorated the box with Google Chrome’s iconic green, yellow, red and blue colours on the sides of the cube, with one side being the google chrome icon itself in order to let the user know where they are at all times.

Finally, we decided to merge all three scenes into one scene in order to bypass the “DestroyonLoad” issue that we had as our player traversed one scene with the other. In order to do so, we made all the Game Objects in the 1st scene and the 3rd scene as children of one empty game object respectively. Then, to avoid any issues as this is a major change, we copied the entire Project File to perform all the major changes in a copy. We then copied the two game object’s from the Project copy’s assets’ folder in the into the Original Project’s Assets Folder. This allowed us to drag and pull the entire scene from our projects asset’s folder inside the 2nd scene(Green Valley Scene).

This merging also required us to change the sceneswap script we had. Instead of using the SceneManager, we just changed the transform of the object to the position we wanted them to be inside the scene.

May 7

Playtest Session #3

Given that we have the scene transition and the dinosaur script done, we wanted to see how the an user would react to this additions so we could get feedback on the experience we are subjecting our players to.

Steven beating the dinosaur

Here is some of the feedback we got from this playtest session:

  • The size of the dinosaur is nice because it makes you feel like there is a threat.
  • Add some form of feedback that lets you know where the dinosaur is once you arrive at Google Chrome
  • The premise of the game is cute, and I would like to continue playing it even more.

May 10-12

This weekend, we focused on finalizing the final interactions necessary for our game to be complete. So far, we have the assignment instantiation, the scene swap, and all three scenes merged into one. Now, we need to finalize the winning and restart conditions, finish the dinosaur script and fix the monitor’s destruction (the object is still carried by the user as it moves from scene 1 to scene 2).

To fix the destruction of the monitor’s script, a simple script attached to the mailbox sufficed.

using System.Collections;

using System.Collections.Generic;

using UnityEngine;

public class Destroymonitor : MonoBehaviour

{

   public bool changed;

   public float initz;

   public float currentz;

   // Start is called before the first frame update

   void Start()

   {

       initz = gameObject.transform.position.z;

       changed = true;

   }

   // Update is called once per frame

   void Update()

   {

       currentz = gameObject.transform.position.z;

       if (changed == true)

       {

           if (initz – currentz > 0.02f || initz – currentz < -0.02f)

           {

               Destroy(gameObject);

               changed = false;

           }

       }

   }

}

As highlighted above, after there is a change in the transform.position of the monitor, the object will be destroyed.

Another major change that we had to achieve to achieve our project’s full fruition is the dinosaur script. This script has a lot of major components that deal with major parts of our project and such will be explained further in the upcoming paragraphs.

Vector3.Movetoward: This function simplified my code immensely. It boils down a lot of the code that I did before to make the dinosaur follow the target as it literally makes the object follow the object with an incremental change in position after every frame and it also changes the rotation of the object so that it looks at the target.

Rigidbody.addforce: Before, I was trying to literally hardcode the position the dinosaur had to be when it jumped, which seemed unnatural as the dinosaur would disappear and then appear somewhere in the air and then fall down. By setting the ForceMode to Impulse and determining the position in space you want the dinosaur to be after the jump, this line of code creates a natural jump of the object to the desired height.

Quaternion. Euler: Something that was happening after the force was added to the rigidbody was that the dinosaur would move amongst its own axis in space. In order to stop this, I froze the rotation of the Game object using the quaternion.euler function in the Update function so that it remains in place within its own axis after every jump.

Lives and hit counter: The lives and hit counters are an essential variable in the dinosaur that determines a lot of functionalities in my project. Whenever the number of hits is equal to the number of lives assigned to the dinosaur in the inspector, the mailbox appears. The mailbox then detects a collision between itself and the assignment to determine the win condition. This can be further appreciated in the mailbox script I attached to the mailbox.

Coroutine and Delay function: I also learned about coroutines and implemented them in the script as well. I used them to cause a delay between every jump as the jumps were happening very frequently frame after frame. I also added the coroutine on the collision detection so that the number of hits between the dinosaur and the player was reduced as a lot of collisions were happening frame after frame too.

The winning and losing conditions of our project were determined by two scripts attached to the mailbox and the player respectively.

This script detects the collision between the mailbox and the assignment. If this happens, the entire scene is reloaded as the player won the game. Dealing with the SceneManager was definitely one of the biggest challenges I had with Unity this semester. Something that I learned after hours of testing different strategies in order to restart an entire scene was that the best way to achieve this is by deleting all of the game objects of the scene (including the player) and then loading the new scene. As such, I found this function “DestroyAllGameObjects()” that iterates through the entire hierarchy and deletes every single game object. I call this function before unloading the current scene and loading the same scene in order to achieve the scene restart condition.

Similarly, this script also detects for a collision between the user and the dinosaur. If the number of attacks supersedes the number of lives allocated to the player, then the scene is restarted. The restart process entails the same logic of destroying all game objects and unloading and loading the scene.

I also added a simple UI element to my project. I added a set of instructions that followed the player as most playtest sessions required me to explain to the user what to do.

May 14

Playtest Session #4

After presenting our project to the class, we wanted to add an additional playtest session so we could fix (if time allows) any last minute bugs in preparation to the IM showcase.

Alex playtest session

This is what Alex said after playing our game:

  • Add a counter in the UI that shows the number of lives you have left and the number of lives the dinosaur has.

May 16: IM SHOWCASE!

The IM Showcase provided the culmination of a month-long endeavor. It was a nice way to end the semester with a positive note and to show an audience of new playtesters the progress of our project. Generally speaking, people enjoyed the premise of our project. They liked the idea of getting inside the Windows XP computer and playing with the different icons, throwing the folder to the ground to generate papers, and fighting against the dinosaur. Most players would generally react in awe (to put it lightly) to the size of the dinosaur, and would generally loose against it as they had no idea of how to react to it. Attached is the different videos of player’s reactions to our game:

After this two-hour long playtest session, these are the main takeaways I collected from the players to improve this project:

  • In chrome world, the assignment goes far away

In the hastiness of fighting the dinosaur with the cactus, some players would throw the assignment far away and wouldn’t be able to catch it after beating the dinosaur so they could win the game. Maybe adding teleportation would have solved this problem, in order to give the user more freedom of movement. Also, teleportation would have made the final fight scene against the dinosaur more exciting as the user could escape the dinosaur and fight it at the same time. This problem could have also been solved by adding box colliders to prevent the assignment from going beyond reach.

  • The initial scene is too big

Scaling our scene was a big issue. When we made the scenes, they were done at a very small size, which also affected the gravity of our objects. Resizing all of the game objects to an appropriate Unity-unit size would have made the experience more enjoyable.

  • Make a more robust, complete UI system

Definitely, the UI we implemented in our project wasn’t as complete as it could have been as we still needed to vocally guide users through our game despite the fact that we added the UI canvas with the instructions. Maybe incorporating audio feedback in every scene would have helped the users know what to do at every step in a more succinct manner,.

PVRK Experience

Yesterday, we had the opportunity to visit PVRK in Dubai Mall. I personally enjoyed the experience as it was a re-defined version of your typical amusement park, which strives to entertain the audience through interactive games, but with the added bonus that most games would immerse the users through virtual reality. From all the games in the park, I really enjoyed the Burj Drop. In this game, you were placed in the shoes of a construction worker who is falling from the tallest building in the world and you experience the same fear and release of endorphins as the game would simulate the falling experience by replicating the falling motion. The motion, coupled with the VR headset, made the experience very engaging and believable. Personally, I thought that the premise of creating a VR amusement park to be an interesting one as it uses this technology to offer something that most amusement parks don’t: an extra layer of interactivity and immersion as offered and allowed by VR. After playing most games in PVRK, I took with me two important, yet juxtaposing takeaways:

  1. How Virtual Reality is still in its infancy

Despite that fact that most games were definitely immersive and fun, there is still some limitations on the immersion which I couldn’t leave aside as I was partaking in such experiences. There is the limitation of space as users can’t really freely roam on the Virtual World and are confined by the bounds delimited by the creators of the game. There is also a lack of identity in the virtual world. Usually, most games put the wearer of the VR headset into the body of a predefined avatar, which can throw the user off as this avatar will most likely have different physical characteristics as the user.Finally, VR games are limited in time. Most of games did not last more than 4-5 minutes.

  1. The promise that Virtual Reality offers

Despite the mishaps mentioned above, the VR experiences in PVRK really point to a future where Virtual Reality can have an all-pervasive impact in the life of the average human. The fact that VR specialists can already create simulations where humans can have their eyes, ears, and sometimes even their sense of touch engaged speaks miles of the progress that has been made in the area and the promise VR has as a means of entertainment.

All in all, after creating our own VR experiences through the Unity Game Engine, it was a nice change of pace to contemplate industry-level VR simulations and use such to learn from as we continue with the process of developing our final projects.

Project 3 Ideation and Storyboarding

Project Title: Windows XPerience

Team member: Junior, Ju Hee, Adham

For this project, we will go back in time to revisit a staple piece of technology: a Windows XP computer with the classic green valley and blue sky background. Our inspiration came after a rigorous brainstorming session were we touched base on a lot of ideas that interested us. After presenting some of the ideas to the class and after further deliberation amongst our group, we decided that this idea provided the best balance between abstract storytelling and realistic implementation considering the timeframe and themes available. The theme our piece will be based on is: “close the door” and we hope to do so in an interesting way, giving the user the possibility to decide the ending of a story where, inevitably, the door will be closed.

As seen in the Scene 1, the user will be in a room with his old-style windows computer appearing in front of him/her. As he/her clicks on it, he will be sucked inside the computer, shadowing the idea presented by Richard Moore in the Disney Animated film Wreck it Ralph 2. In order to escape the computer, the user will have to click on a set of icons in a predefined sequence. Each icon will transport the user into a different scene, and it is up to the user to click on the right set of icons to escape.

Possible Assets:

  • Windows XP Icons
  • Furniture for the room
  • Laptop
  • Paint brushes (Paint Program)

Interactions to Design and Code:

  • Clicking on the icons
  • Scene Manager to move from one scene to another

Sound:

  • God-like voice that tells the user the situation he is trapped in and gives him clues to possibly escape the computer
  • Sound effects for clicking on different icons
  • Sound effect of getting absorbed into the monitor
  • Peaceful background music when the user is in the green valley

Lighting:

  • Stark contrast in lighting between the room and the inside of the computer.
Windows Background we are trying to emulate

Project 1 Documentation

Project 1 Development Blog Link: https://alternaterealities.nyuadim.com/2019/02/11/project-1-development-blog-5/

In this project, the goal I set out to accomplish was to create a peaceful environment. Even though the implementation of such differed in many aspects with my initial idea for the project,  the overarching goal of creating a peaceful environment was definitely accomplished. As such, I will use this piece to talk about the similarities and differences between my project’s ideation and its actual implementation, as well as the process that I went through to go from the former to the later.

Differences

If you look at my first entry in the development blog (link above), my initial idea had the user in the middle of the tent. Even though I could have accomplished this in my project, I decided that locating the user outside of the tent created a more meaningful impact given that the user can enjoy more of the scenery thanks to the 360 degree  look of the natural landscape I created.

I also didn’t add the snack assets into my project. I could not find any of the assets I wanted and instead I placed camping tools and wood logs all over my scene. Cutting wood logs was also something I used to do quite often in my camping trips, so this resulted in a really good alternative.

Similarities

All in all, I can say that the tent part of my idea was accomplished effectively. However, I didn’t expect to get so invested in designing the natural landscape. I spent more than 70% of my time placing trees and playing around with the mountain assets. I really liked this portion of my project, and it made me retrospectively analyze the importance I placed in nature. Whenever I went camping, I thought that the most enjoyable part of the experience was to spend time with my friends and that the landscape/scenery came in as an added bonus. After doing this project, I now know that the refreshing look of nature was more important than how I initially perceived it to be, and I hope that I value more this importance as I go on more camping trips.

Implementation:

As stated in the development blog, the design of the scenery was not the most strenuous part of the process. The most time-consuming part was making the executable file. However, looking my project in a Google cardboard Kit was worth it as it gave me a newfound appreciation of the scene view I created. Also, the terrain object proved to be really difficult to alter in the version of Unity I had installed in my computer. As such, I had to use a cube for my floor and then use a mountain asset to fill the user’s distant view with mountain tops.

Documentation Project 2 (Interactions)

Initial Post: https://alternaterealities.nyuadim.com/2019/03/04/project-2-storyboard-claire-junior-atoka/

Development Blog: https://alternaterealities.nyuadim.com/2019/03/20/development-blog-project-2-interactions/

In retrospect, creating and implementing the interactions for this project was definitely a worthwhile experience. Learning to teach yourself a new software is definitely a realistic expectation of someone’s professional career and this project provided an excellent testing ground for such expectation. However, there where several unexpected mishaps that intervened with the project’s complete fruition as well as major moments of success and I will explain such in the following paragraphs.

  • SteamVR

SteamVR repertoire of scripts and prefabs allowed me to implement the grabbing of the glasses really easily. However, my initial approach to create the change of camera blurr was to modify the scripts that came with SteamVR. However, this scripts are overly complicated and not easily readable which resulted in me just messing up this interaction in my efforts of implementing additional functionalities to the game.

Another problem that occured whenever I was working on my project was that Steamvr stopped working unexpectedly. This was an unexpected bug that forced me to create an entirely new project file, export all files (expect the SteamVR plugin)  from my original project to the new project file, and then install and import a new SteamVR plugin into my new project file.

  • New Scripts

Given the issue with Steam VR and its closed system that doesn’t allow for a modification of its scripts, I decided to create four new scenes with different colors(Atoka’s idea) and glasses. This resulted in a modification of our projects initial idea, as well as a different functionality. The user now has to look for the glasses, and once they find them, they will be transported into an entirely new scene with misplaced glasses located in an entirely new place. The user must now find the glasses in each scene, and then at the end, the will end up in a new scene with corrected vision. In order to change scenes,I used Unity Scene Manager library. I created four sceneswaps scripts and I attached one to each pair of glasses.

using System.Collections;

using System.Collections.Generic;

using UnityEngine;

using UnityEngine.SceneManagement;

public class sceneswap : MonoBehaviour

{

   // Start is called before the first frame update

   public bool changed;

   public string[] scenes = { “Bathroom7Blue”, “scene1”, “Bathroom7Green”, “Bathroom7Red” };

   public float initz;

   public float currentz;

   public Scene currentscene;

   void Start()

   {

       currentscene = SceneManager.GetActiveScene();

       initz = GameObject.Find(“Glasses1”).transform.position.z;

       changed = true;

   }

   // Update is called once per frame

   void Update()

   {

       currentz= GameObject.Find(“Glasses1”).transform.position.z;

       print(“currentz: “+currentz);

       print(“initz:”+  initz);

       if (changed==true)

       {

           if (initz != currentz)

           {

               Destroy(gameObject);

               SceneManager.LoadSceneAsync(scenes[3]);

               SceneManager.UnloadSceneAsync(currentscene);

               //Application.LoadLevel(2);

               changed = false;

           }

       }

   }

}

Note: There are four scripts like the one above implemented in my project, each one for each pair of glasses that is linked to a particular scene.

At first, I wanted to modify the Interactable script so that the scene is swapped whenever the game object is attached to the hand. However, even though the change of scene was achieved through this approach, the flow of the code was interfered with which resulted in interfering with the Interactable Hover Events Script (the glasses wouldn’t stop glowing). The approach I  implemented in the above mentioned script was to base the scene swap in the position of the glasses. Once the glasses were moved from their original position, the scene will change. I used the Game Objects Z value, but the x or y value would work as well.

Further Improvement

Even though both interactions were achieved, some things could been added in order to fully culminate tha narrative we wanted to achieve. Some sound could have been added by my partners. Also, maybe changing the camera blurr back to normal once the user goes to the last scene would have been excellent as well. All in all, I am really proud of the results of this project and what it came to be.

Development Blog Project 2 (Interactions)

Initial Post: https://alternaterealities.nyuadim.com/2019/03/04/project-2-storyboard-claire-junior-atoka/

March 5, 2018

For our project, we plan on implementing two interactions that makes the user fully delve into our virtual reality world . The first one is the ability to grab the glasses. The second one is to make the camera view blurry. We plan on intertwining both experiences by changing the camera view as the user grabs the glasses. Given the explorative and exciting nature of the project, I volunteered to work on the interactions as I believe this will be an opportunity to learn more about c# scripting for Unity while my partners are interested more in the design of the scene.

March 13, 2018

Now that the scene is completed, it is my job to implement the interactions necessary for our project. As I started researching and exploring more about Unity, I concluded that there are two approaches that can be taken to achieve the interactions. The first one is to use the scripts that come with SteamVR’s “Interactions” scene and then build upon them. The second one is to write the scripts from scratch by following tutorials online. I decided that the former is more feasible than the later given the timeframe imposed on us. Therefore, I deleted the camera Object that comes with Unity and I pasted the Player prefab that comes with steamvR into our hierarchy given that SteamVR’s scripts are fully compatible with the SteamVR’s player prefab. I then grabbed the following scripts from Steam VR and included them into my glasses:

  • Velocity Estimator
  • Interactable
  • Interactable Hover Events
  • Throwable
Scripts borrowed from SteamVR

These scripts gave the glasses a lot of capabilities. First off, they light up whenever they are touched by the  controllers. And after they are grabbed, the scripts allow the users to throw the glasses and they are affected by gravity which means that they fall accordingly and interact with floor once they land.

March 15, 2018

After talking with professor Sarah Fay Krom, I am now able to use the post-processing stack that comes with Unity. This will allow me to change the camera view and make it blurry. The post-processing stack generates a script that can then integrated into the camera. This script can be modified through an easy-to-use panel that appears in the hierarchy which allows you to change things like: depth of field, blur, motion blur, color grading, etc.

Post Processing Stack recommendations by Professor Krom

Form of Representation Suited for VR: Coding World

I’ve always been attracted to VR simulations that go beyond entertainment. I firmly believe that the possibilities for VR are limitless and such can be used to solve problems that hinder humans all over the world.  Therefore, I believe that the best VR simulation that can be implemented is educational. Ever since I was a kid, I considered myself to be a visual learner. Despite the fact that I can understand things on a superficial level just by listening, all information that is cemented in my brain has some form of visual representation attached to it. The same applies nowadays as I am studying Data Structures and Algorithms. I always need to spend time making drawings and concept maps in order to fully understand the concepts in class. Some of the concepts are really difficult to follow just by listening to a lecture and a virtual 3D animation of concepts like recursion, binary trees, and sorting algorithms will best be understood by learners all over the world who struggle with these concepts. This world will resemble those platforms like Scratch that teach programming to kids but will match the complexity of higher level programming concepts and algorithms with a medium like virtual reality which will much better represents the concepts.

Teaching Coding to kids

Interaction and Title

Samsung be fearless fear of heights -City Scapes

As someone who used to be afraid of heights as a kid, I felt really connected to this application as it immerses the user in three different types of outdoor settings (elevator, skywalk, and a virtually created tower) with each setting having multiple difficulty levels in order to slowly ease you into the experience. Usually, I tend to see that most virtual reality applications are designed for entertainment purposes. However, I am, interested in learning more about VR experiences with impactful applications that can change someone’s life for the better, and Cityscapes does exactly this. In addition, the application has the possibility of pairing up with a Gear S2 to measure the heartbeat of the user in order to gauge the user’s progress.

In terms of communicating information and composing an attractive view, the app developers did an outstanding job in simulating a real-life environment that can actually make the user’s fear of heights be tested in a variety of ways. As such, I believe that a careful research was done in order to design the best environment possible, one that takes the user into this simulated world and lets them leave with less fear after hours of use.

After perusing through different VR titles, I realized that I want to create one that lets the user interact with non-human entities from our world. For my 1st project, I created a simulation of a camping site and I really enjoyed doing so. As such, I would like to continue delving into the idea of simulating human’s interaction with nature in order to bring awareness on the impact (oftentimes a negative one) that humans have with nature and extend the significance this interaction has for the user.

Project 1 Development Blog

Blog 1: February 11, 2018

For my 1st attempt at creating an alternative reality experience, I want to create a peaceful environment. Ever since I was a kid, looking at a picture or listening to a song that emanated peace would make my day better and would make me forget of whatever I was stressed or worried about. I believe I can create a similar type of experience in this project, and I want to achieve such through an activity I am personally connected to: camping. I believe that nature has a way of making humans forget about worldly concerns as it provides perspective and makes us look at the bigger picture: why worry about the menial job-related, school-related, or anything-related thing that is worrying us when there is a bigger,captivating  landscape we can draw our eyes to. The complexity of nature and how simply it can make me forget about my worries is a juxtaposition I want the users experience.

Sketch of Desired Environment

As seen in the picture, the user would be set in the middle of the tent. The user would be  able to look outside and see the night stars and then look at the tent from the inside if they do a 180 degree turn. Inside the tent I would have a sleeping bag and some snacks(as seen in the picture, I am obsessed with doritos, coke and oreos as they are the staple cuisine of my camping trips). I also hope to play music in the background that emulates the sounds of nature (crickets chirping, sound of the wind, and the sound of the leaves being hit by the wind).  However, given that I haven’t explored the extent to which I can use Unity in order to create such environment, the three main things I want to portray in my environment are: self-discovery, nature, and isolation. I am open to create an environment that does the aforementioned in a more technically feasible way, but I thought that the tent environment was a good starting point.

Blog Update February 18:

After experimenting in Unity, I was able to learn a little about changing the sky, working with the terrain asset, and importing the tent asset. I imported a sky asset that makes it looks like its night and it has a moon on it, which is something that took me a while to accomplish. I also learned about importing the terrain asset, but I am having problems editing it. I wanted to extrude the terrain so I can create mountains, but for some reason my laptop is unresponsive to this command. I am also having problems synchronising my laptop and the Google VR SDK for IOS, but I am hoping to fix this in the time coming.

Screenshot 1

Blog Update: February 20

As I continued to play around with the terrain, I realized that for my purposes the terrain wasn’t necessary, and I could achieve a similar result using a terrain composed of a cube object. This proved to be extremely fruitful and easier to manipulate and play around with as I added new assets. After creating the terrain and setting the camp site in the middle, I decided to start adding trees around my campsite to create the illusion of nature. As I did this, patterns emerged, and I was able to create clusters of trees and duplicate them to populate the entire terrain faster. I then added extra elements to the campsite to make it more relatable and believable, like tree chunks located in a circular pattern with some axes stuck in them, torches, bushes, and rocks to surround the site.

View of entire environment from above
Box approach

As a final step, I wanted to fill the viewer’s sight with something as you could steel see the blueprint of the Unity IDE far in the horizon. My original idea was to play with my initial concept a little by creating an enclosing environment surrounding my terrain in order to create a juxtaposition between the openness of the nature that is near you and the enslavement of the box that covers it. However, after realizing that the box surrounding the terrain dims the lighting in a way that prevents the user from seeing the nature and the campsite that surrounds him/her, I decided to populate the horizon with mountains. As a final touch, I added music to the environment to further cement the illusion of nature. The music is composed of a mixture of wind sounds, animal sounds, and dry leaves cracking, which I hope makes a better experience for the user.

User’s view

Another problem I encounter was to build and run the environment on my iPhone. Xcode couldn’t run the code and it was requiring some form of “provisional file” from my iPhone. As a result, I resorted in running the application on Android, and after installing the necessary software, I was able to make an apk file that can run on any android phone.

As a camper with over 10 years of experience, I can attest that this environment really makes me feel like I am back home in one of my usual camping outings, secluding myself from society and just letting the openness of nature enclose me, revitalize me, and inspire me. I am happy that I was able to create a peaceful environment through my campsite environment, and seeing the beauty of the final result definitely obliterated the copious amounts of stress I accumulated as I made this project.